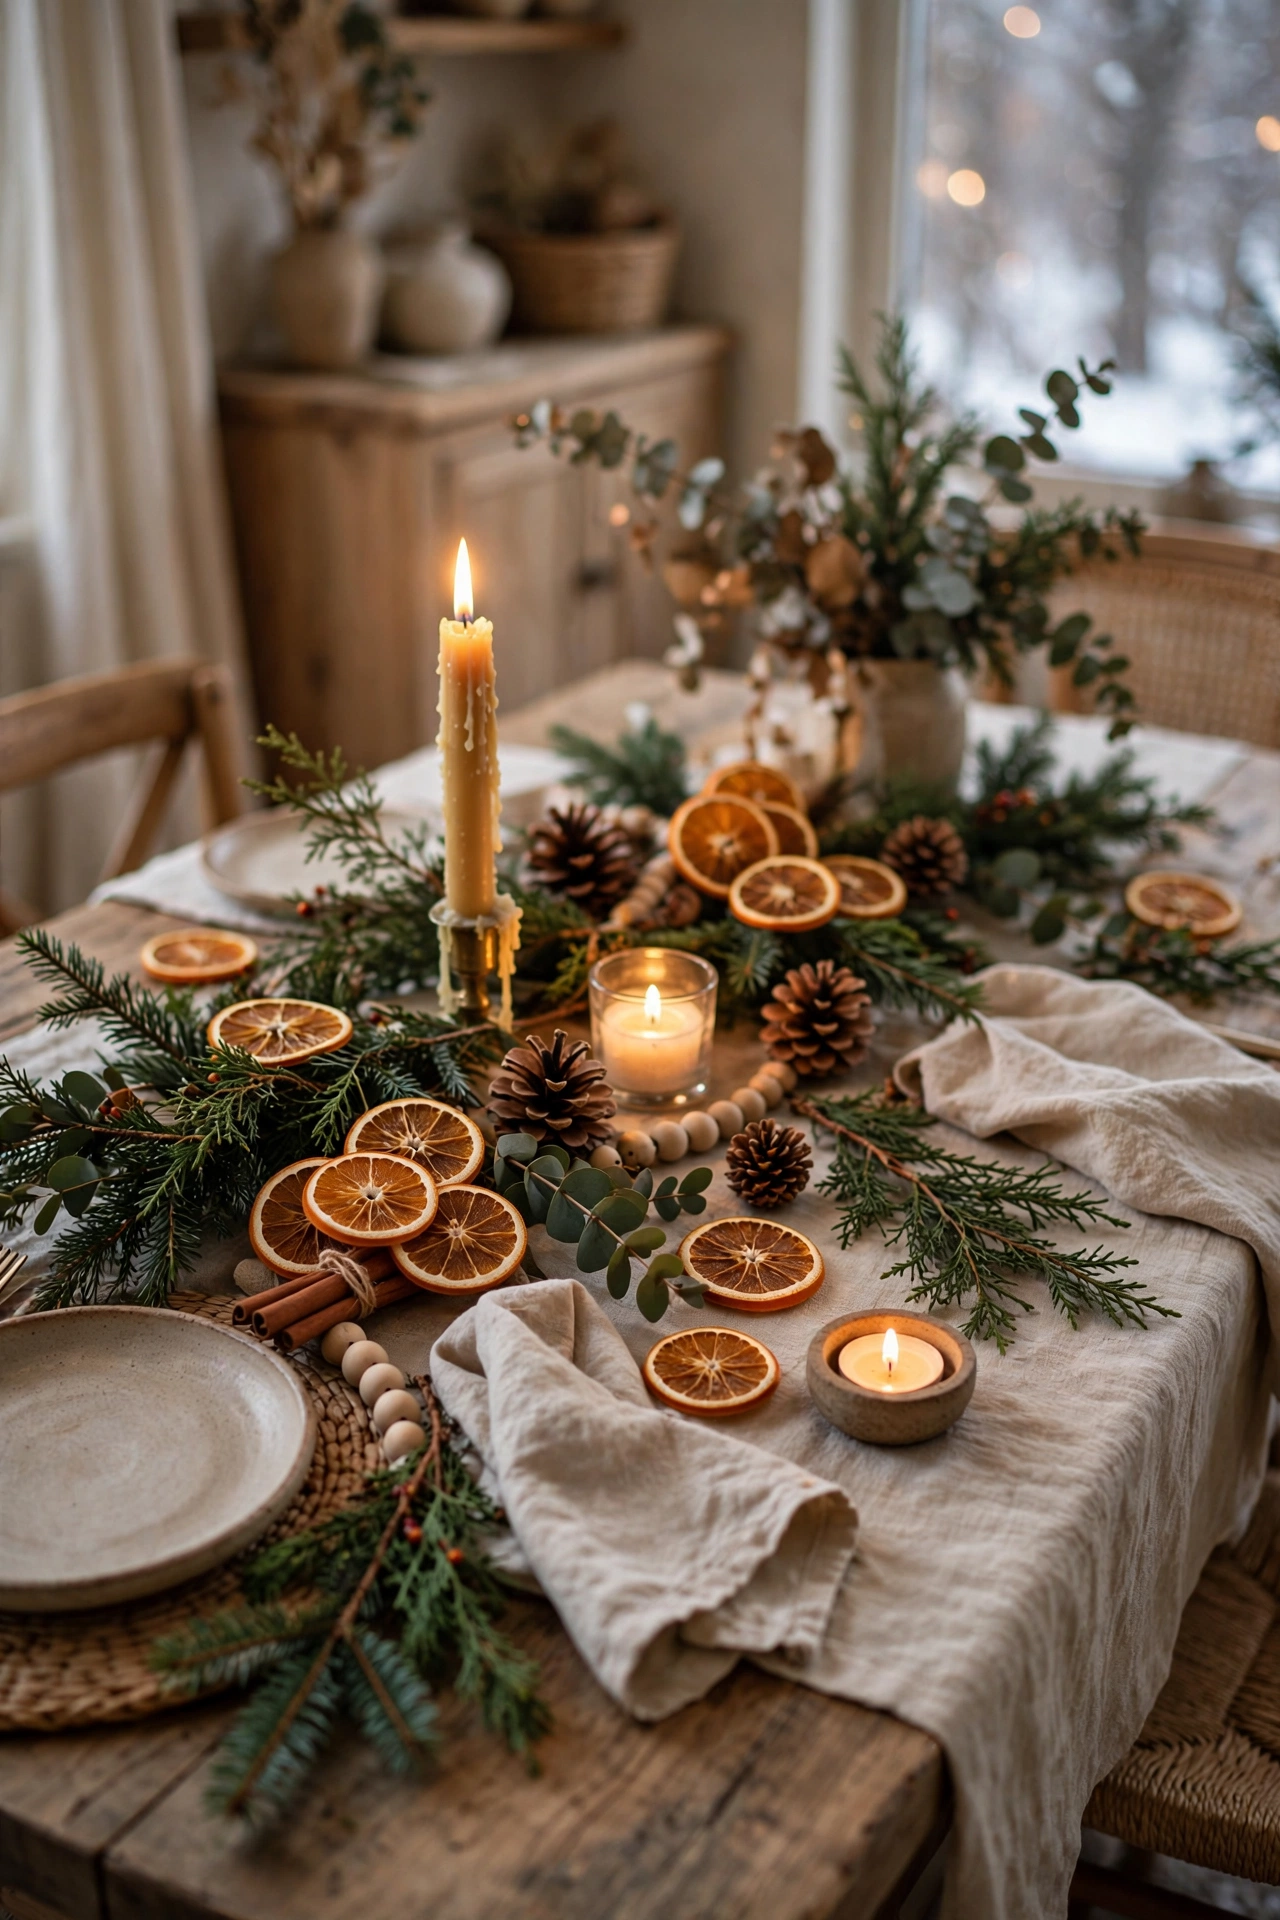
A natural Christmas table uses materials that look good without shine or plastic. Dried oranges, pinecones, evergreen stems, wood, linen, and cinnamon give color, texture, and scent while keeping the table calm and easy to clear after the meal. Choose one main natural material per table, and repeat it in small touches, so the setting looks planned rather than crowded.
Use the rating line under each heading to choose by time and cost. Dry oranges fully before use, gather pinecones early, and test each layout on the bare table before plates go down. The checklist at the end covers that test in one pass. Keep serving dishes, water glasses, and the centerpiece in separate zones, so the table stays easy to use from the first course to the last.
1. Dried Orange Garland Down the Center
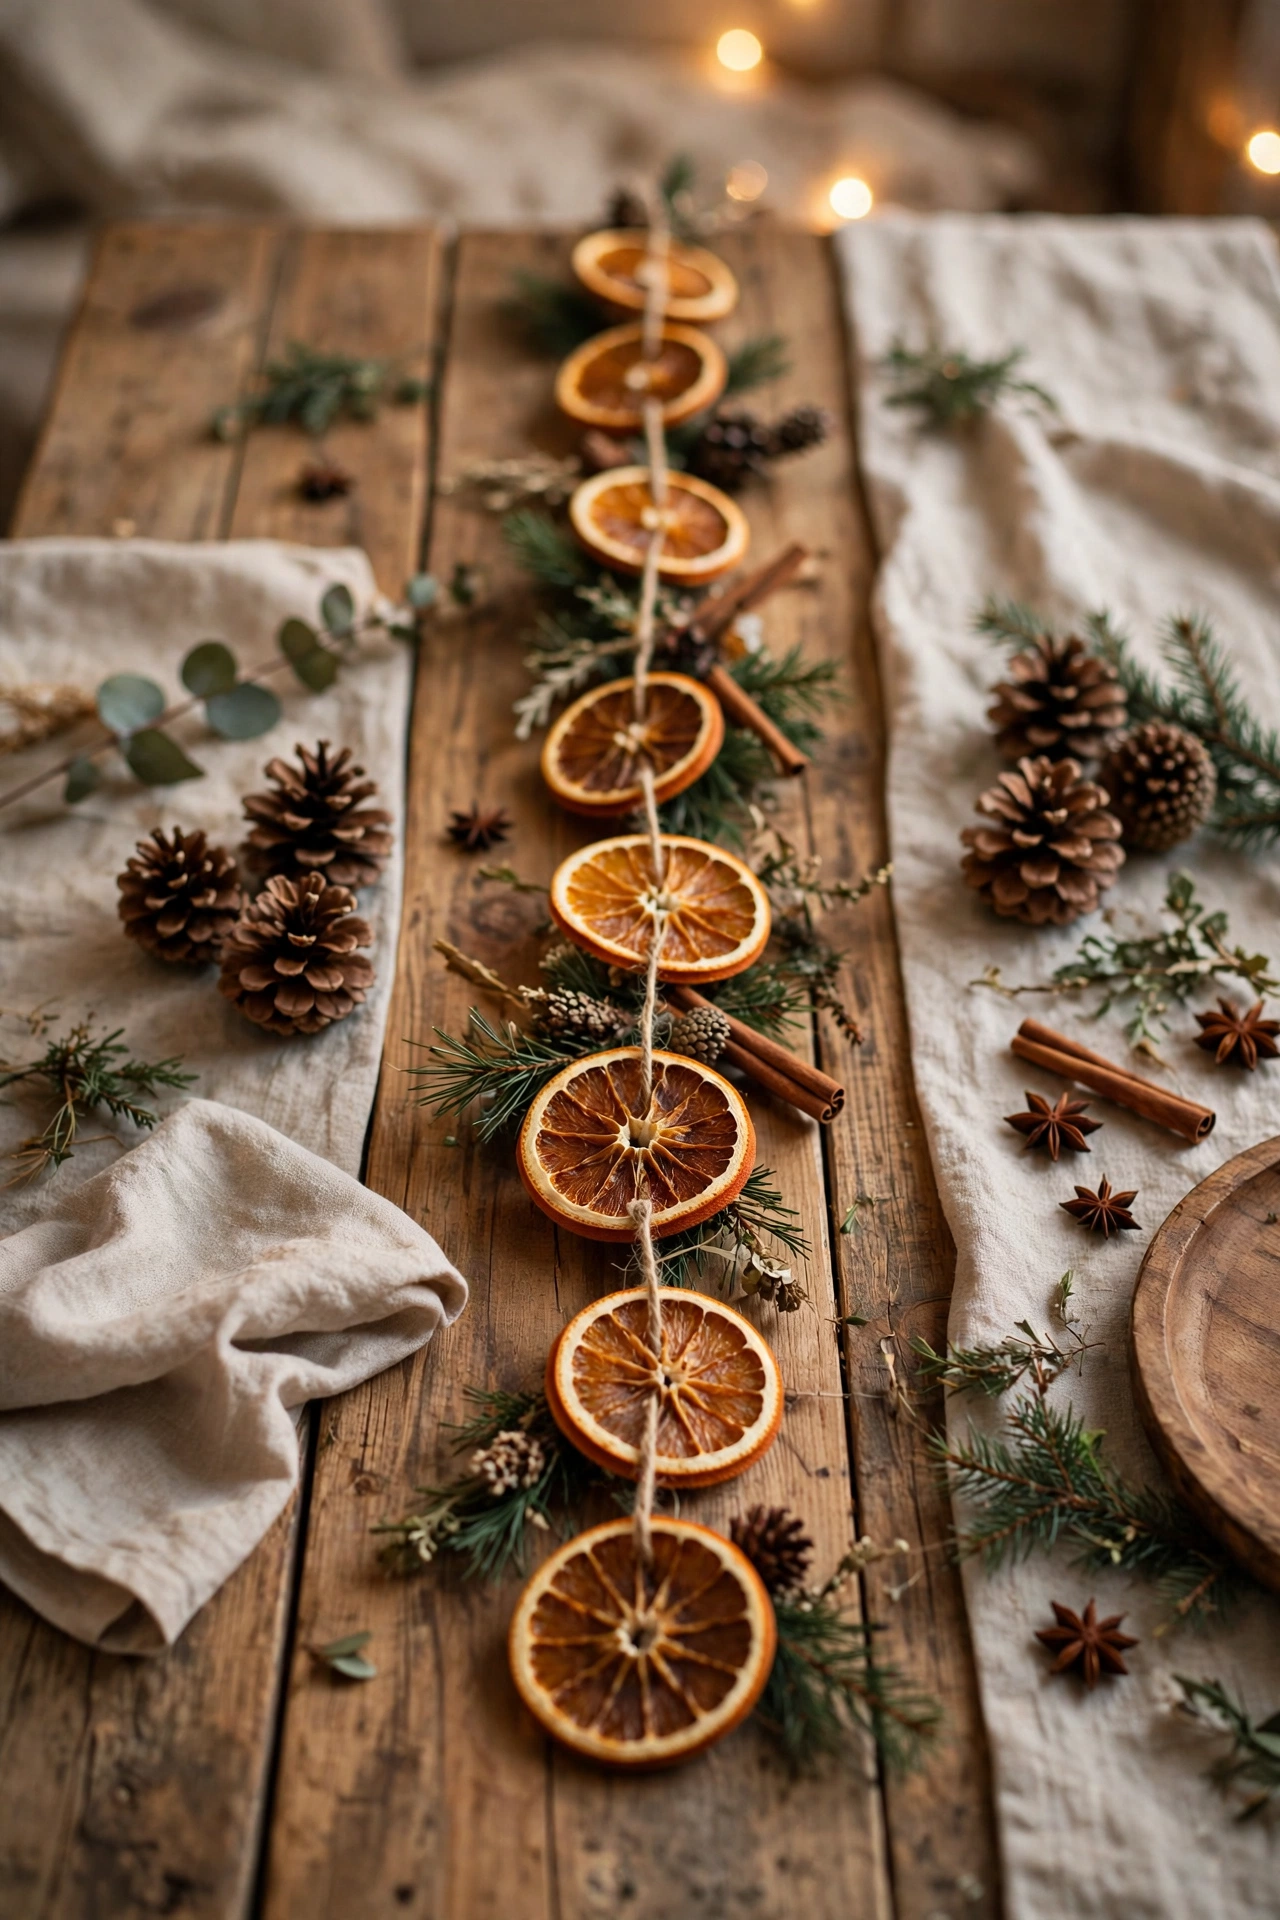
Best for: long dining tables. Time: 30 minutes to arrange. Cost: low. Effort: easy.
String dried orange slices on twine and lay the garland straight down the center, with small gaps for serving dishes. The slices add warm color against linen and wood, and the garland lifts off in one piece when the table needs clearing for dessert. Leave twine ends long enough to shorten the garland for a smaller table.
What you need:
- Dried orange slices, fully dry and firm
- Natural twine or thin cotton string
- Large needle for threading the slices
- Small scissors for trimming loose ends
Avoid this: soft or damp orange slices, which stain linen and sag.
2. Pinecone and Evergreen Table Runner
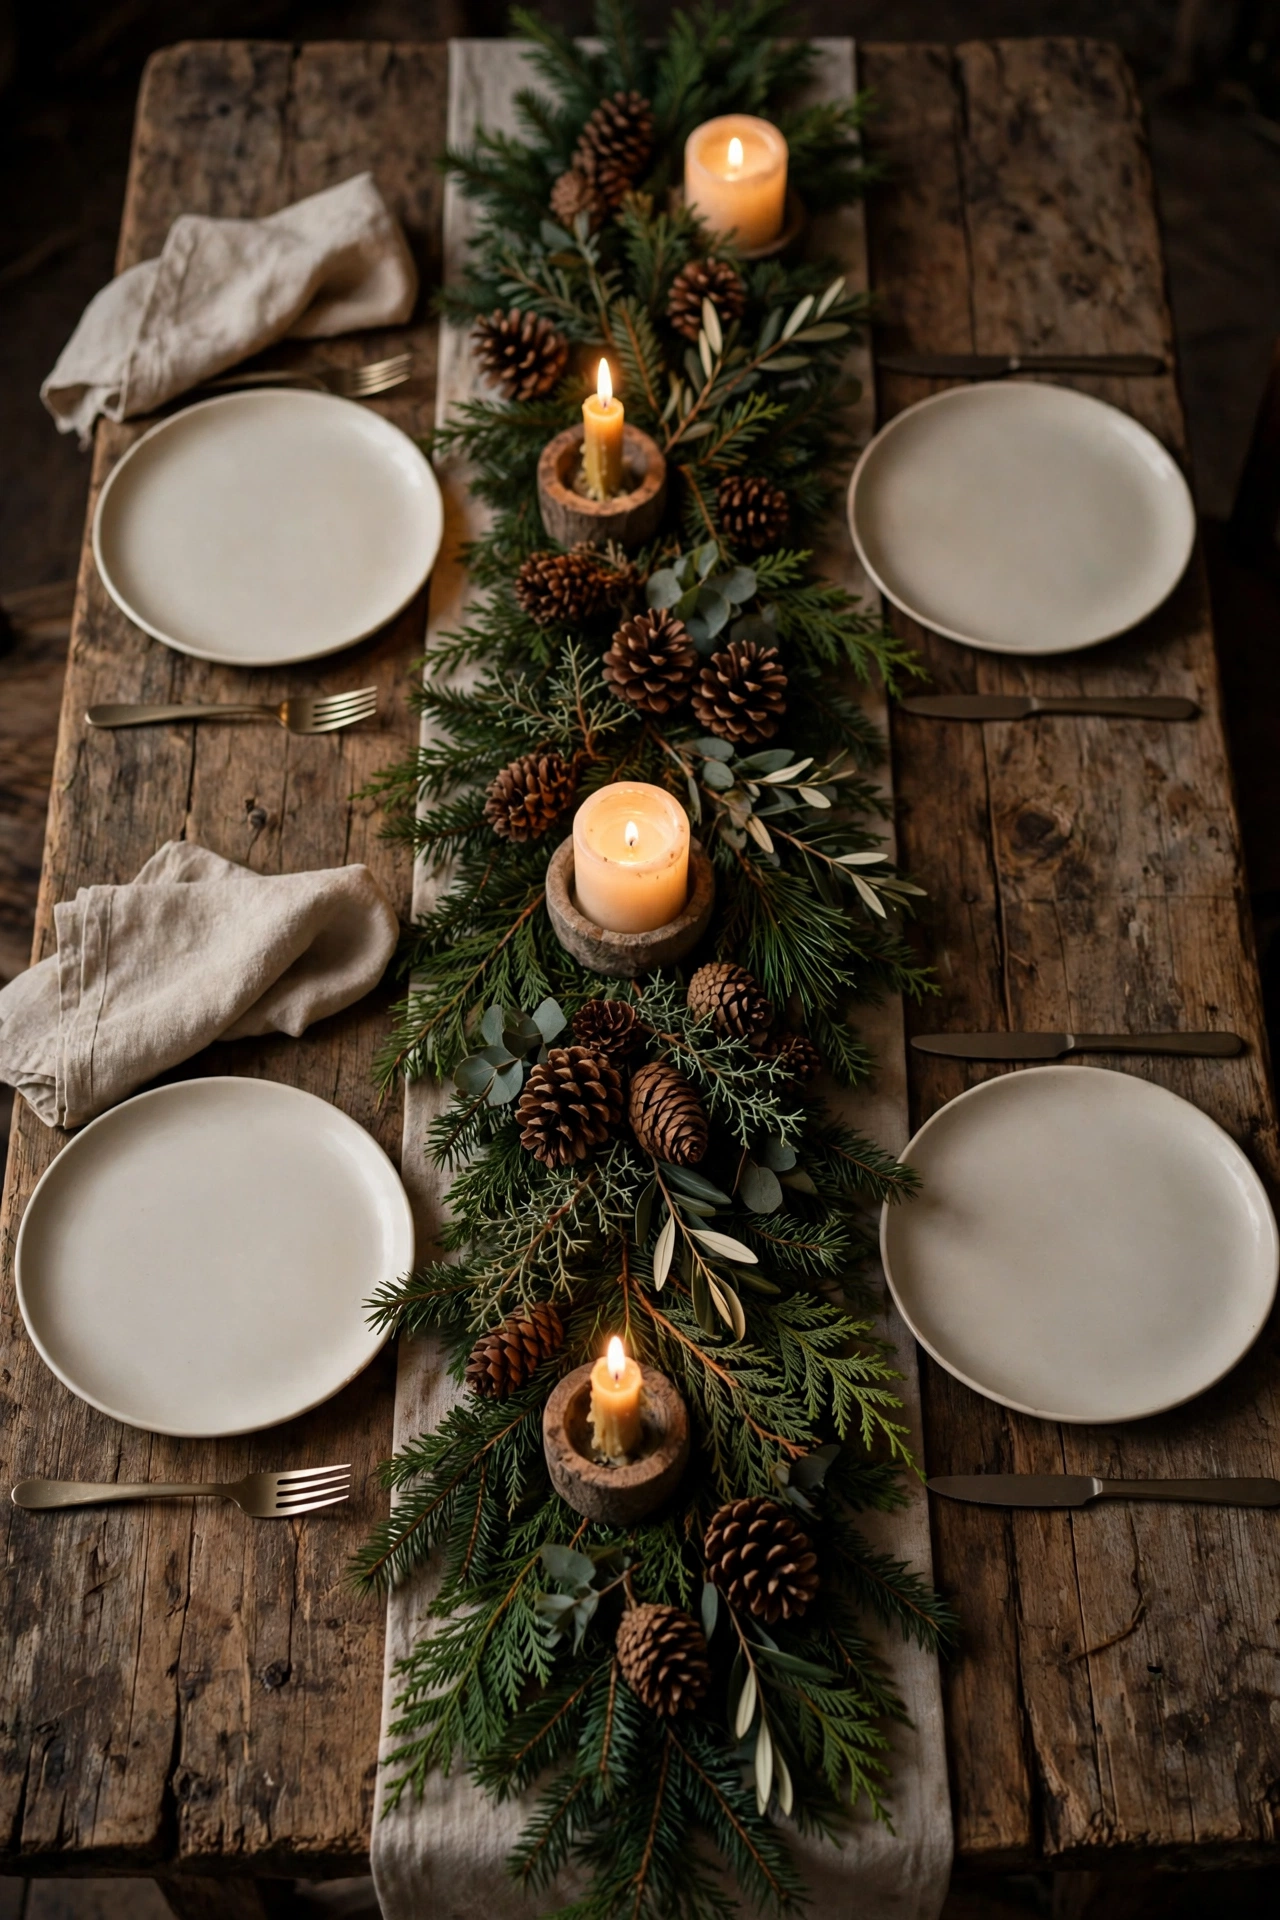
Best for: rustic and farmhouse tables. Time: 25 minutes. Cost: low. Effort: easy.
Lay evergreen stems lengthwise down the table and tuck pinecones between them, keeping the runner low and narrow. The runner frames the plates without blocking views across the table, and every piece can be composted or stored after the meal. Store leftover pinecones dry, ready for the next natural table.
Steps:
- Lay a narrow linen or burlap runner first, if one is used.
- Place evergreen stems end to end down the center.
- Tuck pinecones into gaps, largest at the ends.
- Step back and check that plates still fit on both sides.
Avoid this: a runner so wide that plates, glasses, and dishes crowd together.
3. Wood Slice Chargers Under Plain Plates
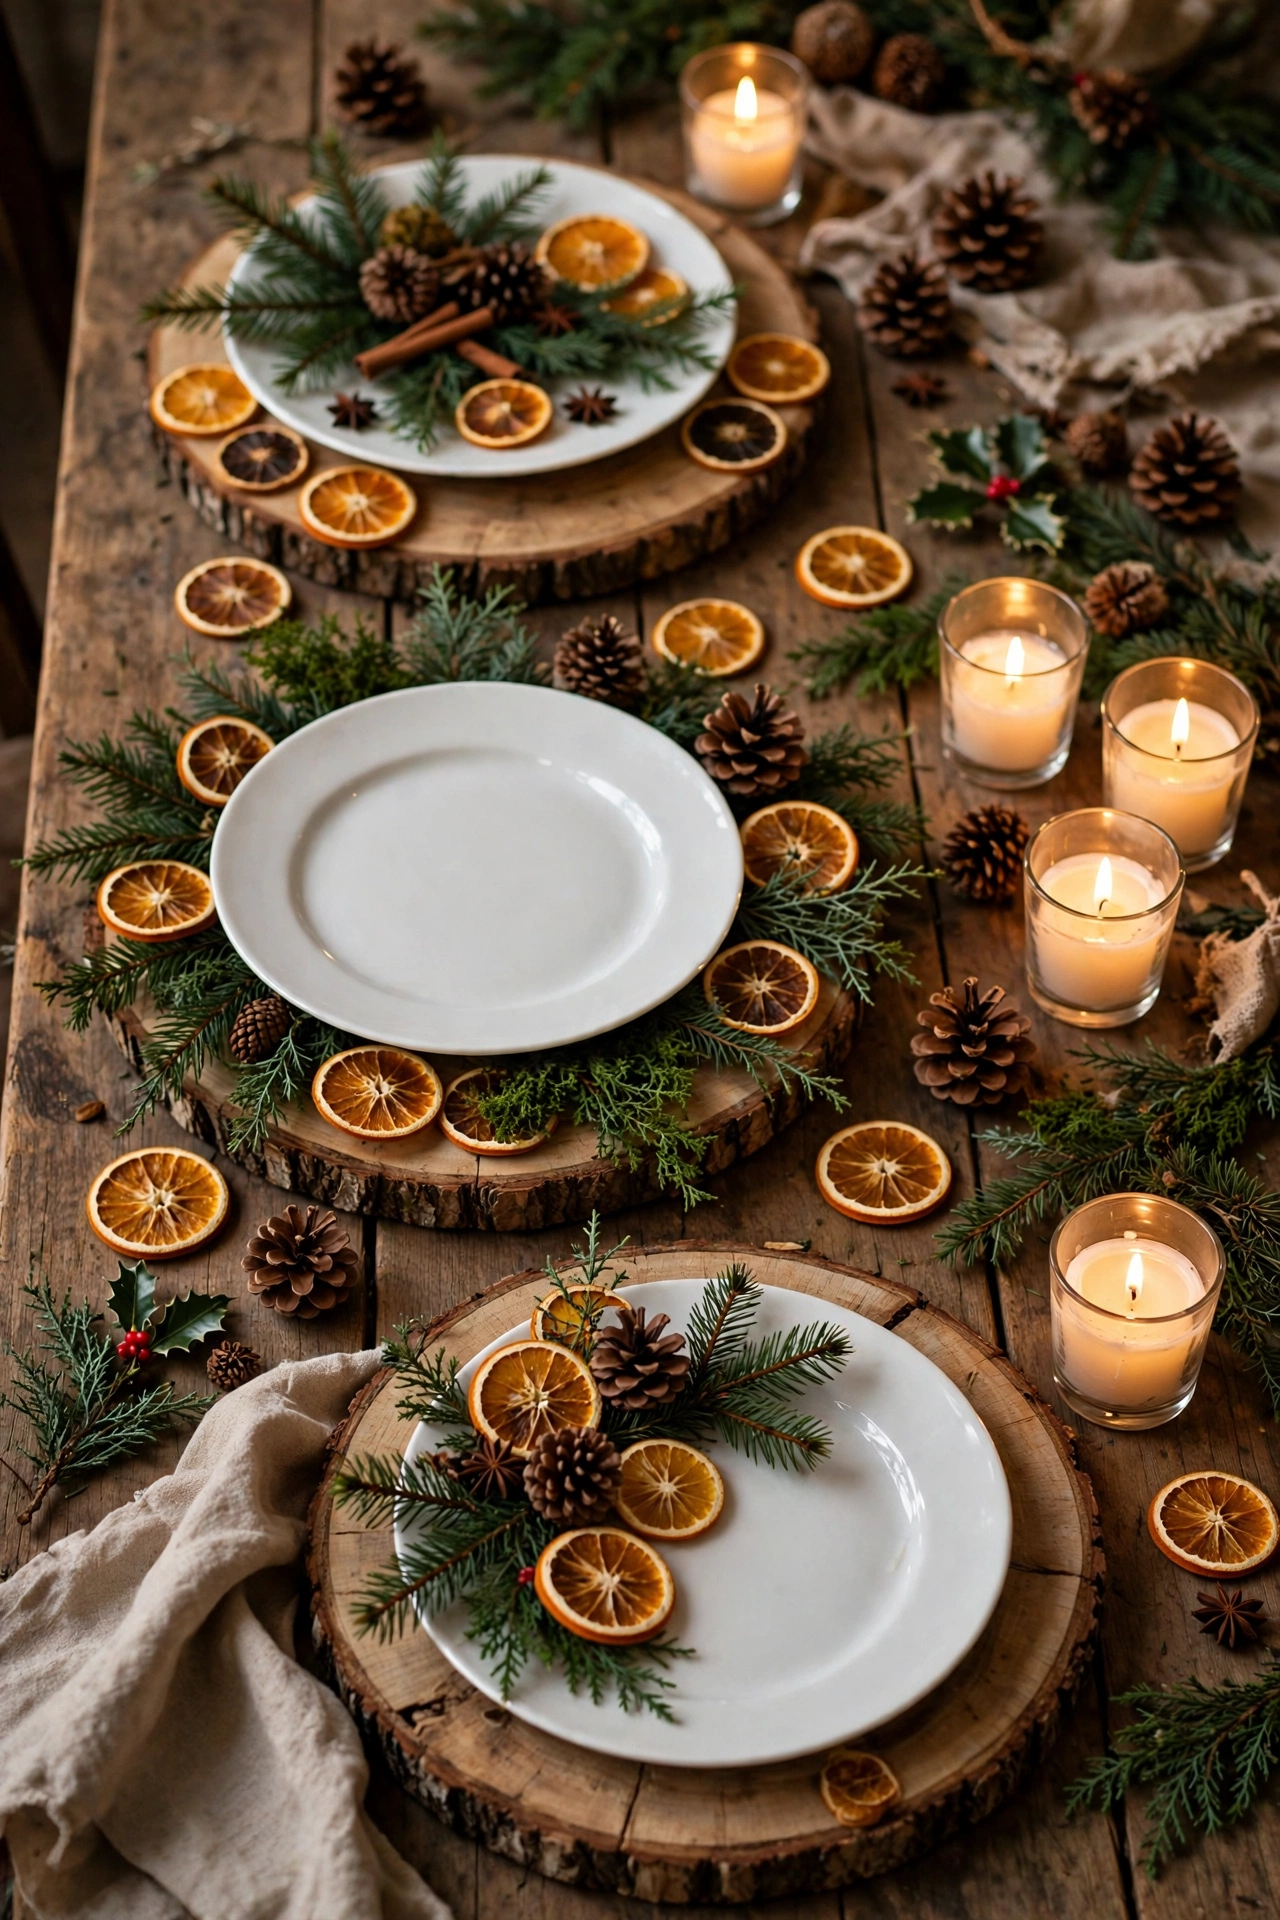
Best for: casual Christmas dinners. Time: 10 minutes. Cost: low to medium. Effort: easy.
Place a flat wood slice under each plain plate to add warmth and texture without a patterned charger. The wood works with white, cream, or green plates, and the natural edge makes each setting look slightly different without extra decoration. Wipe slices clean before use, and check for cracks after washing.
Check before you buy:
- Wood slices are flat, dry, and sanded smooth
- Slices are wide enough for the plates used
- Finish is food-safe or plates sit fully on top
- No loose bark falls onto the table or food
Avoid this: rough or damp wood slices that scratch plates or shed bark.
4. Rosemary Sprig Napkin Rings
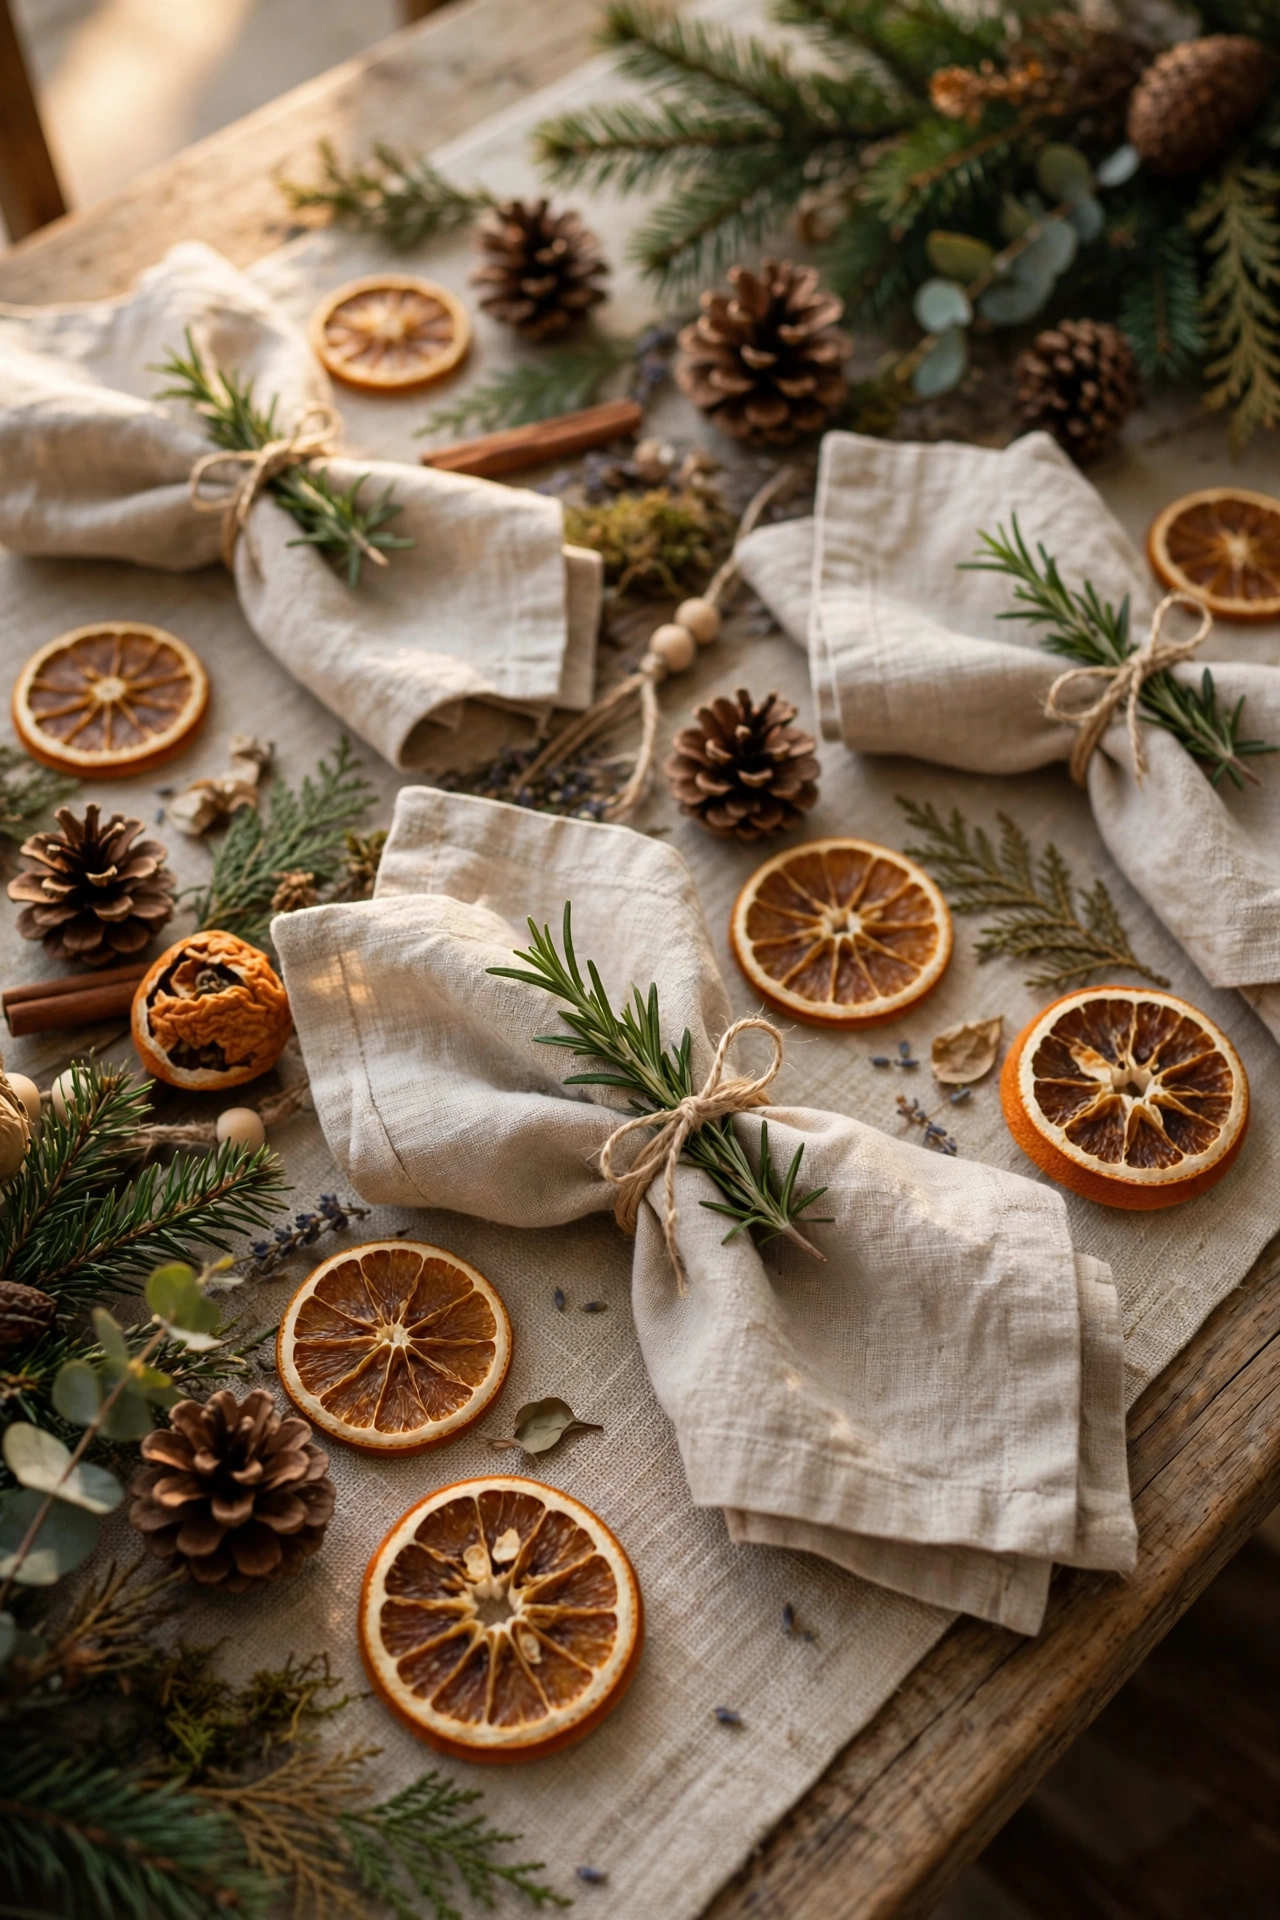
Best for: place settings with folded napkins. Time: 15 minutes. Cost: low. Effort: easy.
Tie a fresh rosemary sprig around each folded napkin with twine for a setting that smells fresh when guests sit down. The sprig doubles as a small garnish marker, and guests can set it aside on the plate edge before eating. Trim sprigs to equal length before tying, for a tidy row.
What you need:
- Fresh rosemary sprigs, similar in length
- Natural twine, cut into short lengths
- Cloth napkins, folded or rolled
- Small scissors for trimming twine ends
Avoid this: dry rosemary that sheds needles over plates and laps.
5. Dried Orange Place Cards on Twine
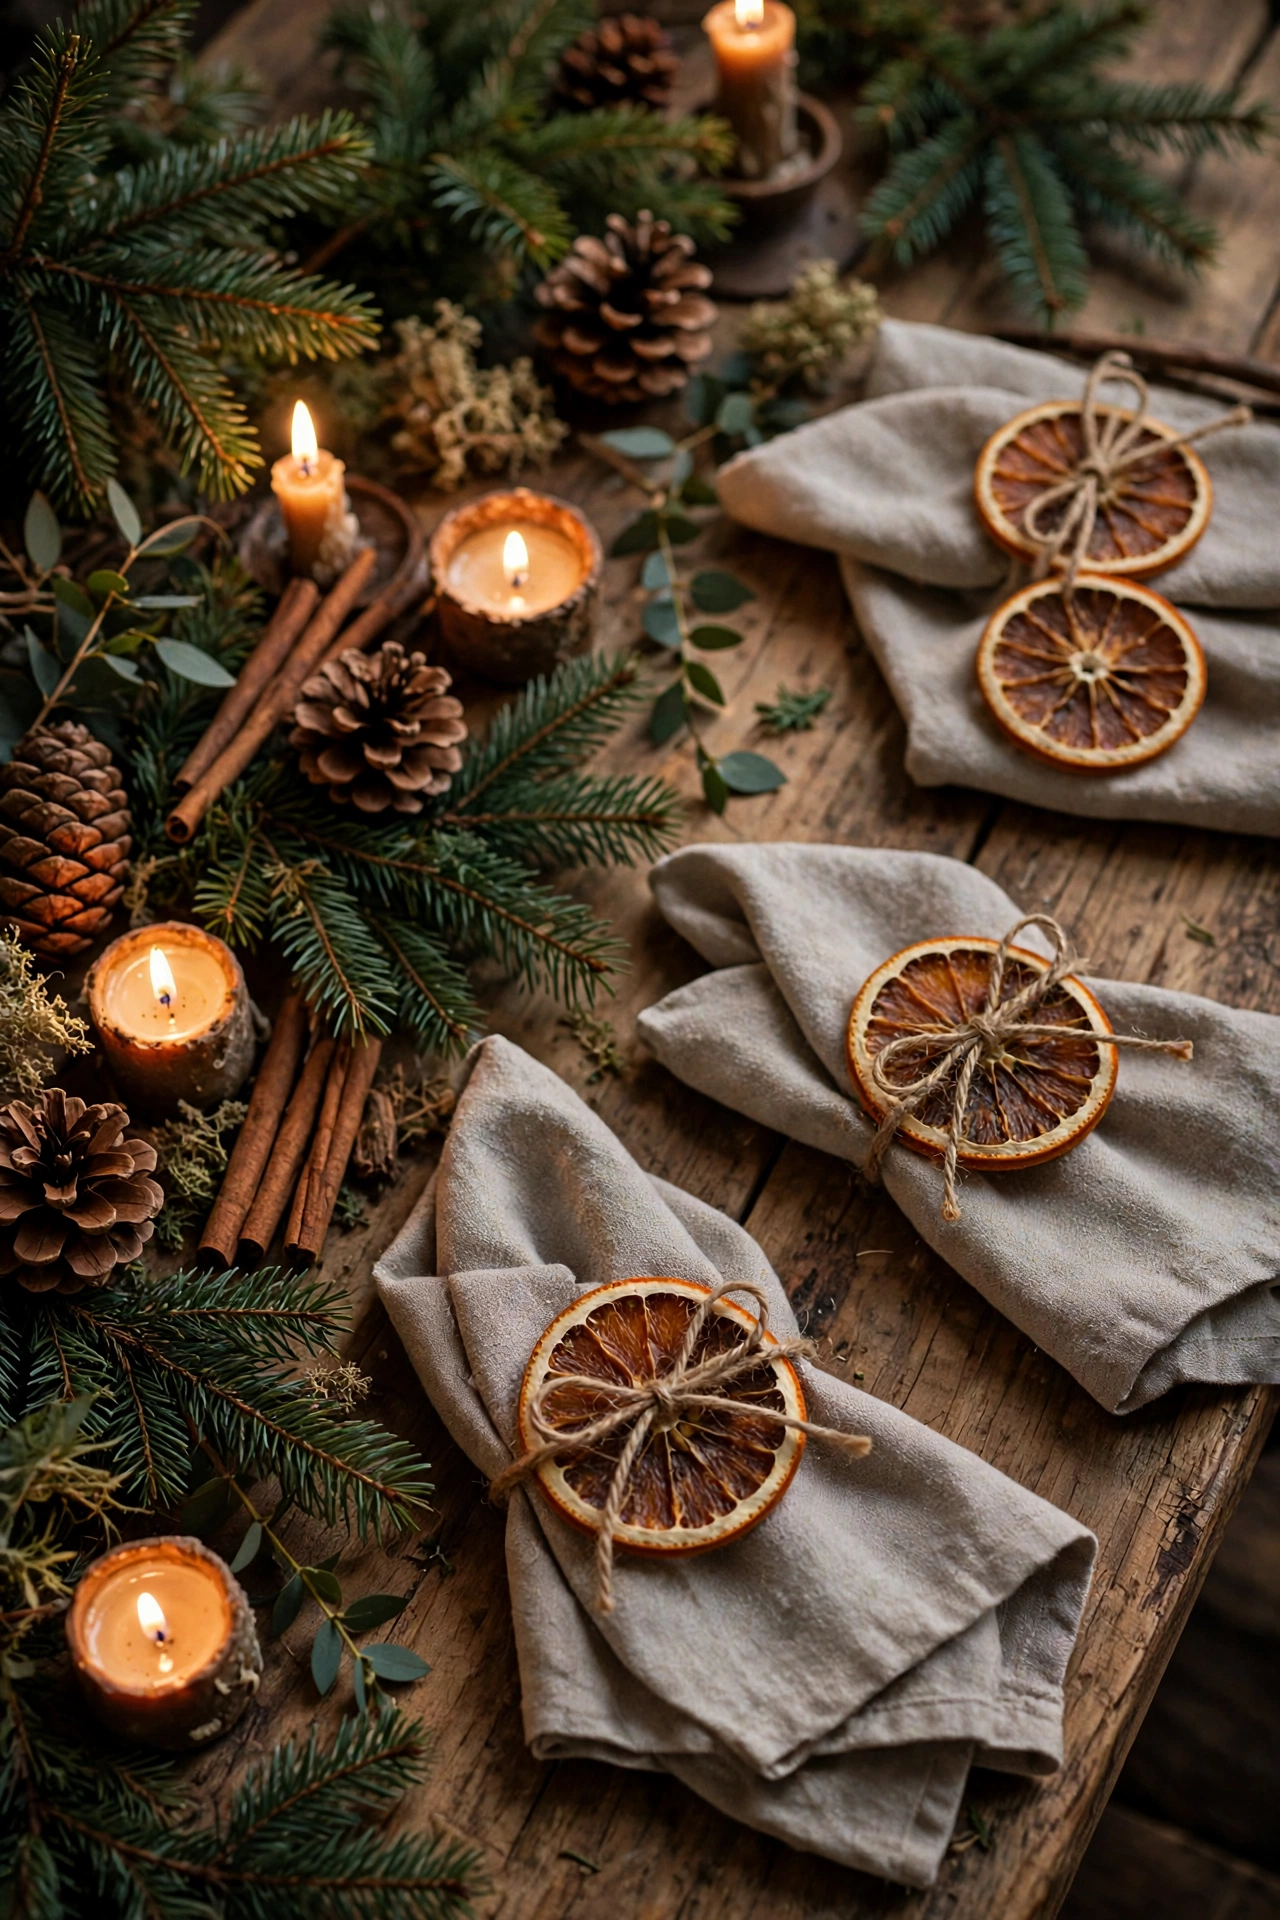
Best for: assigned seating at large tables. Time: 20 minutes. Cost: low. Effort: easy.
Write each name on a small kraft card, punch a hole in one corner, and tie the card to a dried orange slice with twine. Lean each slice against a glass or lay it flat on the plate, so guests find seats quickly without a separate card holder. Use the same pen and card size for every guest.
Steps:
- Write names clearly on kraft cards with a dark pen.
- Punch one hole in the top corner of each card.
- Thread twine through the card and an orange slice.
- Place one slice at each setting, name facing up.
Avoid this: pale ink or small writing that guests cannot read at the table.
6. Pinecone Name Holders for Each Guest
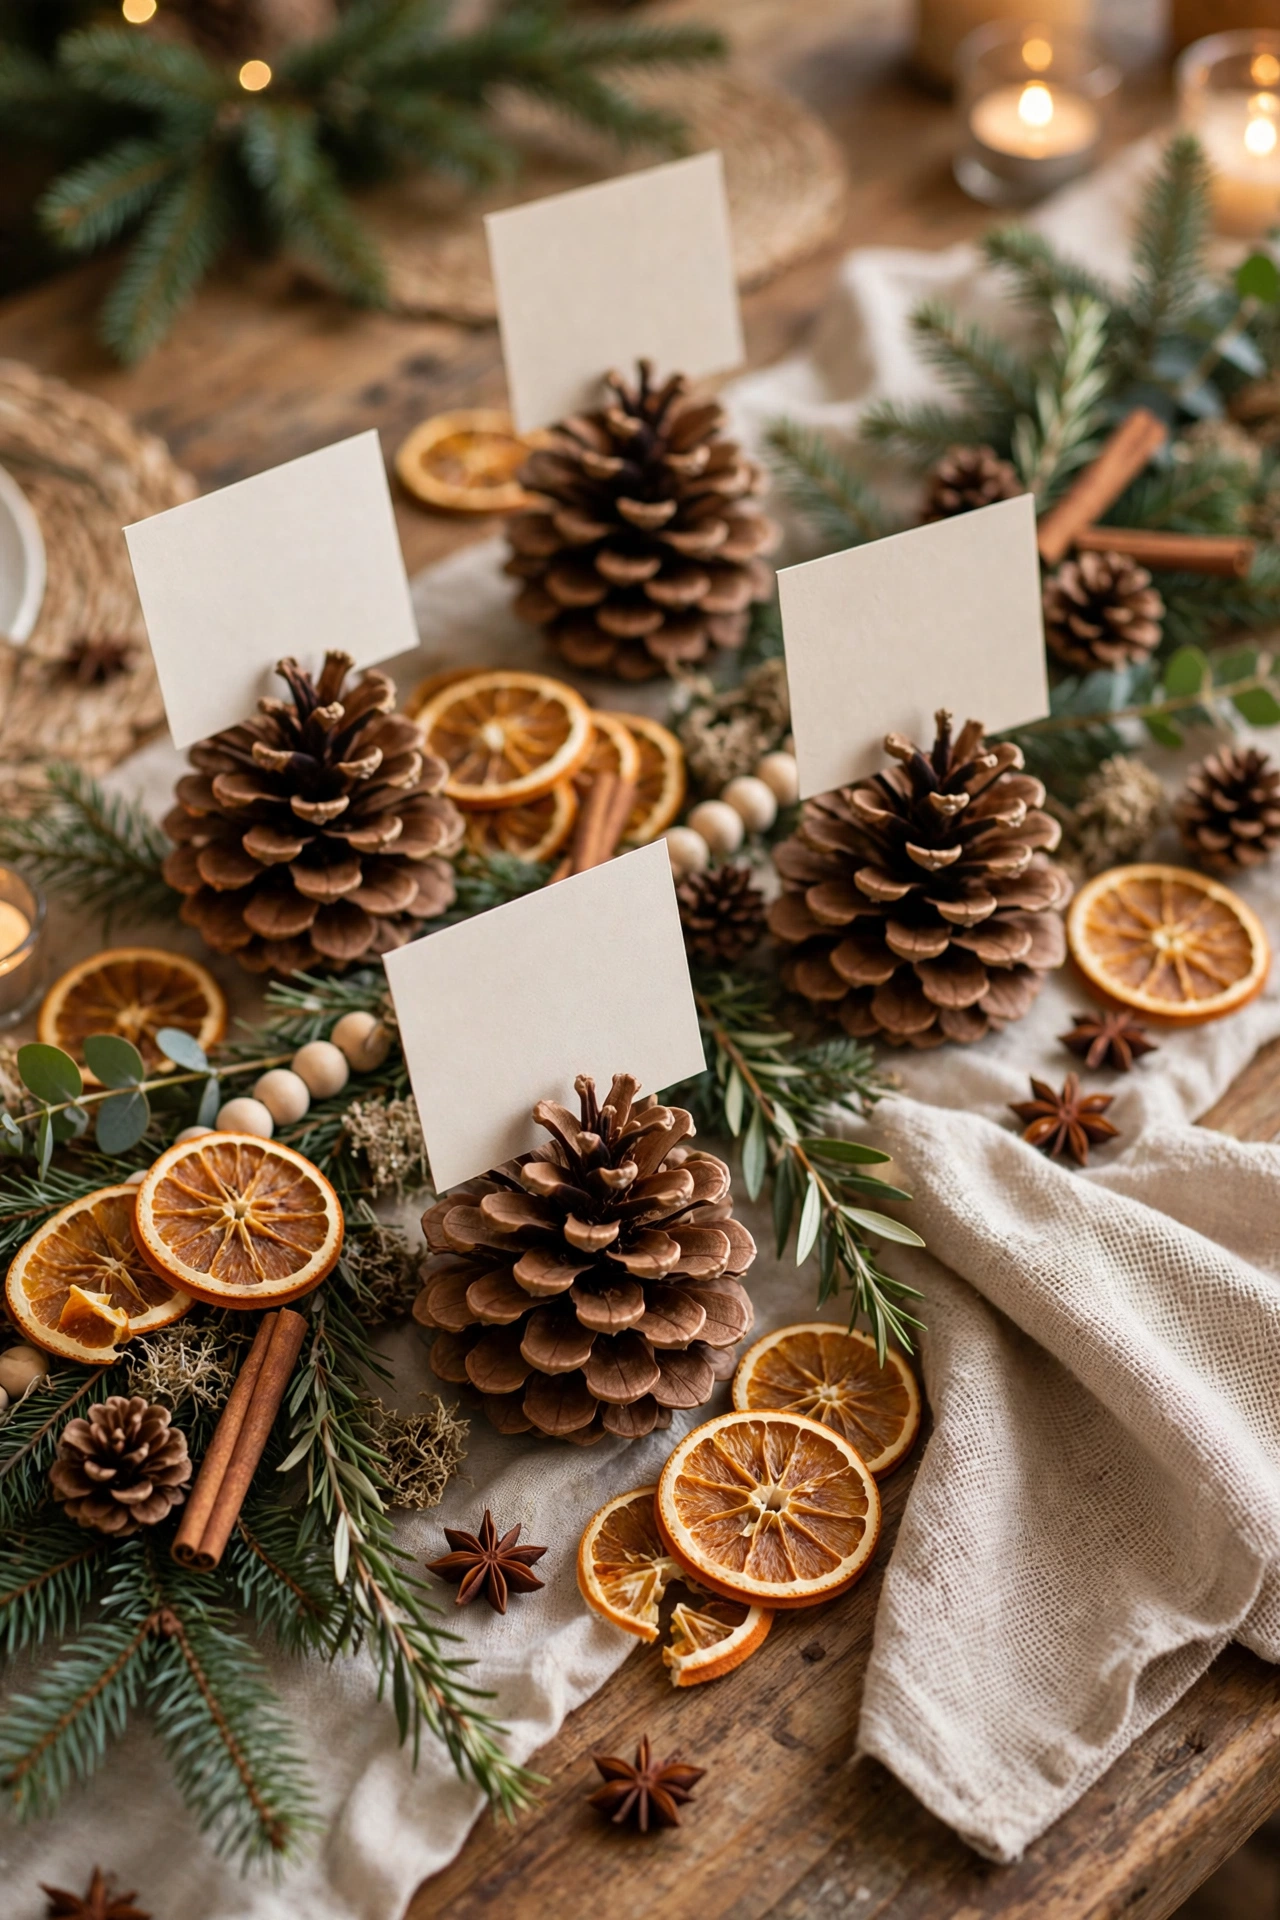
Best for: tables with children and large groups. Time: 20 minutes. Cost: low. Effort: easy.
Stand a pinecone upright on the table and slot a small name card between its scales near the top. The pinecone holds the card at a readable angle, stays stable on a flat table, and gives each guest a small natural keepsake to take home. Test each pinecone on the bare table before writing cards.
What you need:
- Pinecones that stand flat on their bases
- Small kraft or cream name cards
- Dark pen for clear names
- Sharp knife or scissors to trim card edges
Avoid this: pinecones that rock or roll when the table is bumped.
7. Cinnamon Stick Bundle Napkin Ties
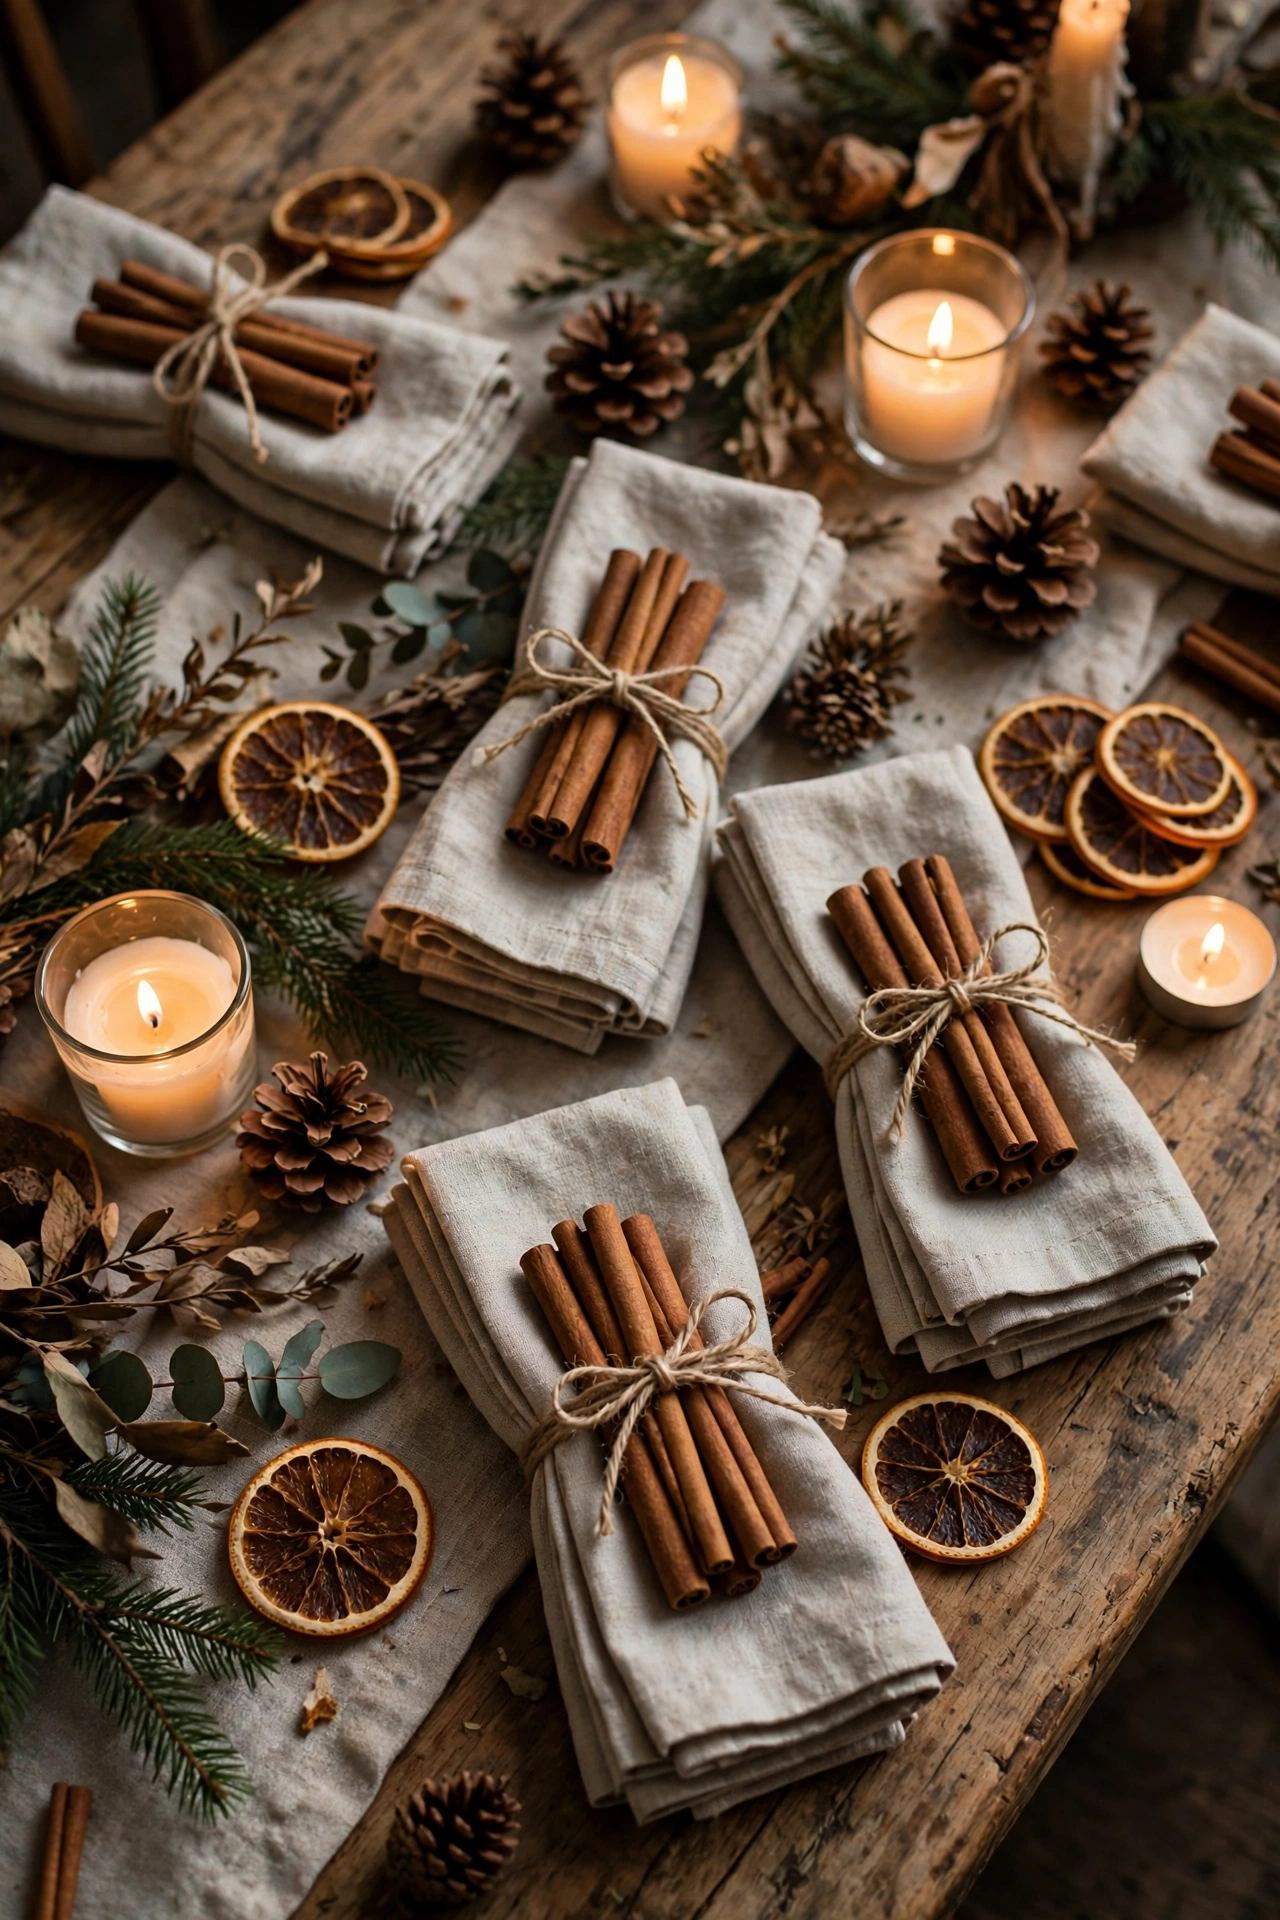
Best for: warm, spiced table themes. Time: 15 minutes. Cost: low. Effort: easy.
Bundle two or three cinnamon sticks with twine around each napkin for a setting that looks finished without a metal ring. The sticks add scent and a straight, tidy line, and the bundle stays in place through serving, clearing, and second helpings. Tie bundles firmly, then trim twine ends to equal length.
Check before you buy:
- Cinnamon sticks are straight, dry, and unbroken
- Twine is strong enough to hold the bundle tight
- Napkins are thick enough to hold their fold
- Sticks are kept clear of sauces and wet food
Avoid this: loose bundles that slide off napkins during serving.
8. Cranberry and Greenery Water Bowl
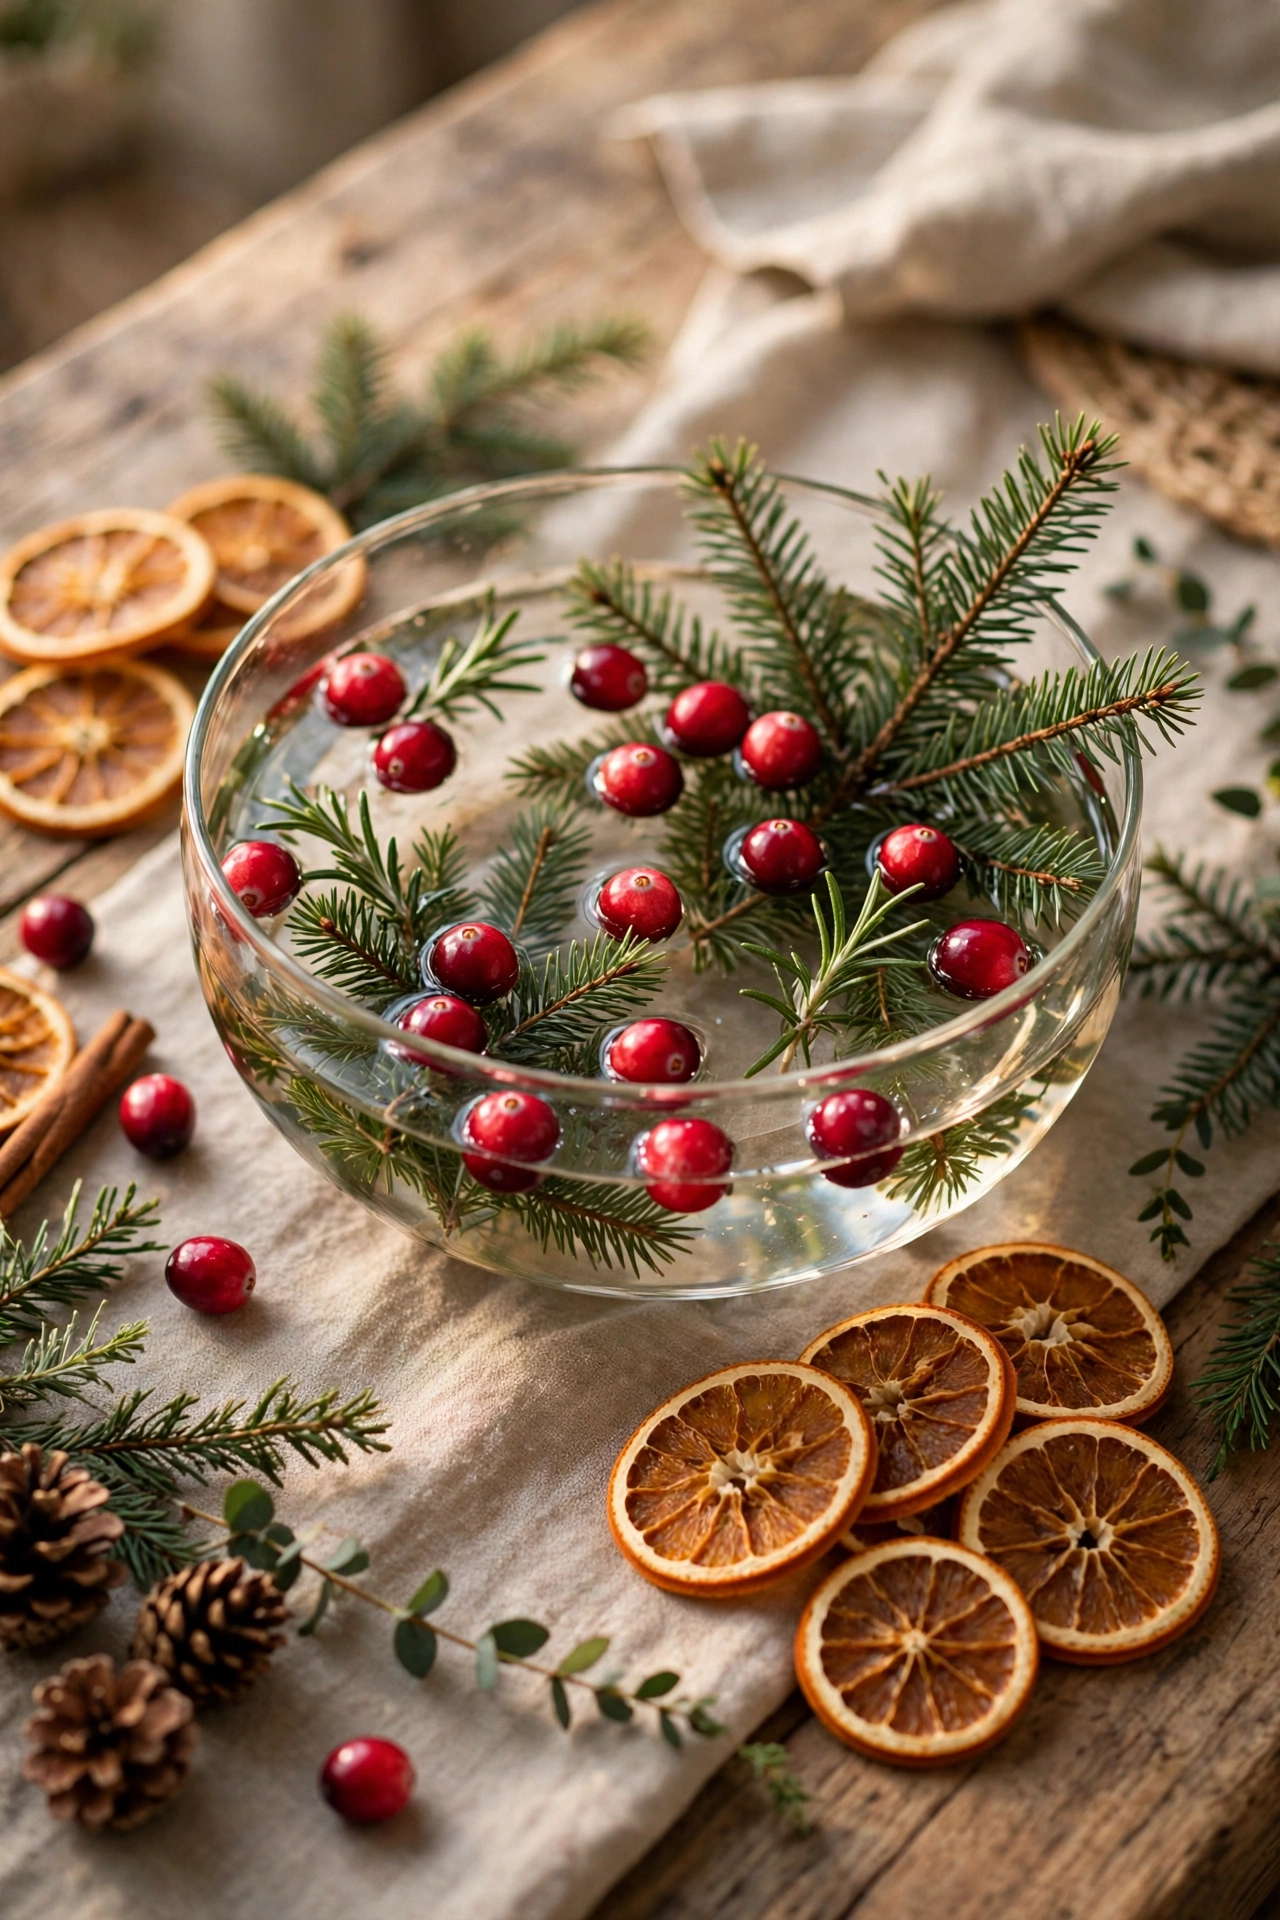
Best for: centerpieces without flowers. Time: 15 minutes. Cost: low. Effort: easy.
Fill a wide, low bowl with water, add fresh cranberries and short evergreen sprigs, and set it in the center of the table. The red berries float or rest just under the surface, and the bowl reflects candlelight without taking height from the table or blocking conversation. Change the water daily if the bowl stays up for several days.
Steps:
- Choose a wide, low bowl that sits stable on the table.
- Fill it two-thirds full with cool water.
- Add cranberries and short evergreen sprigs.
- Place the bowl where serving dishes will not crowd it.
Avoid this: a tall or narrow bowl that tips easily when bumped.
9. Foraged Branch Centerpiece in a Tall Vase
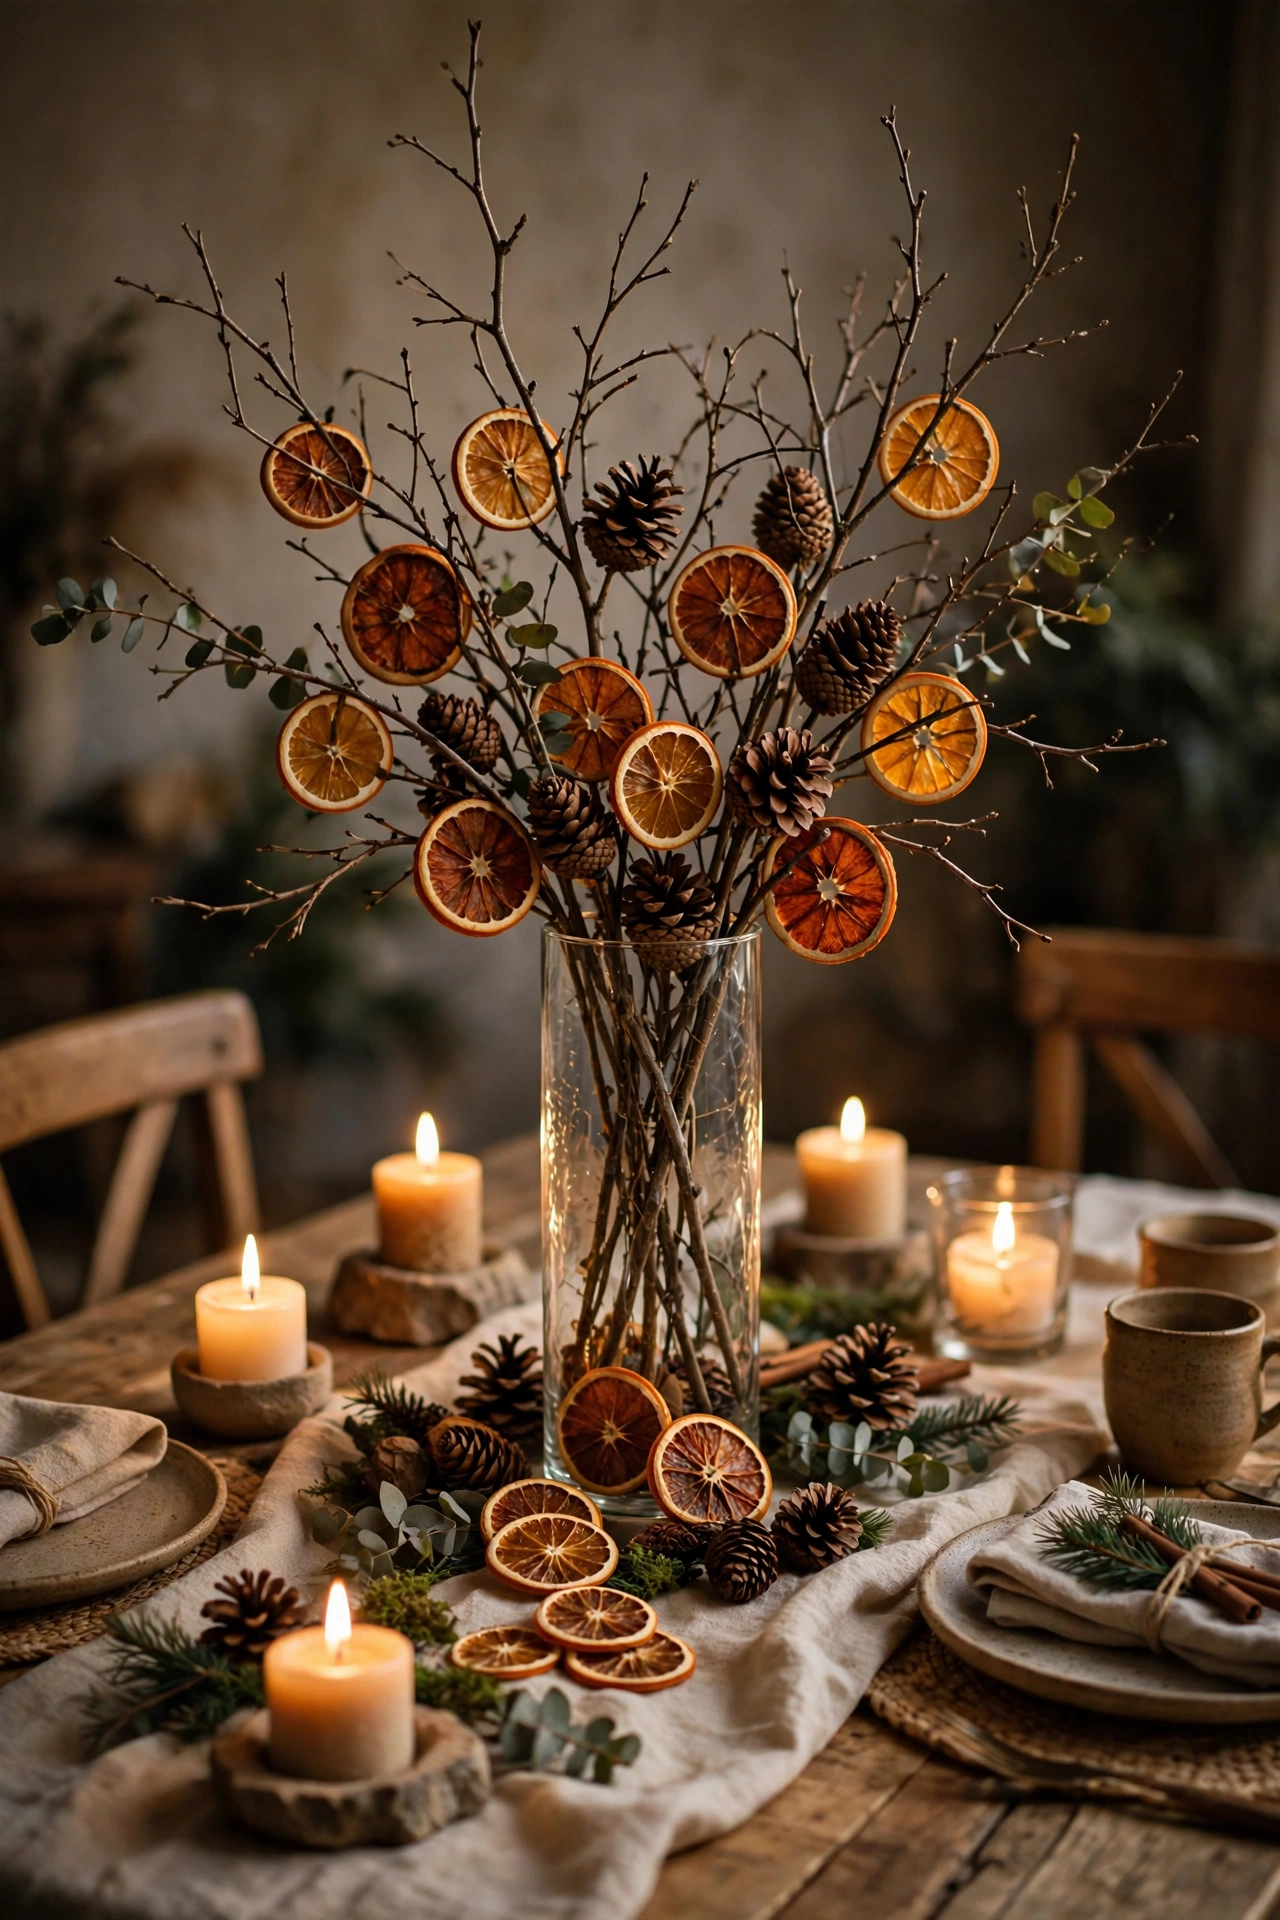
Best for: tables needing height without width. Time: 20 minutes. Cost: low. Effort: easy.
Stand bare branches in a tall, heavy vase and hang two or three dried orange slices from the upper branches with twine. The branches add height and winter shape, while the narrow vase base leaves the table surface free for dishes, glasses, and serving bowls. Keep the vase base heavy, and trim branches before arranging.
What you need:
- Tall, heavy vase with a narrow neck
- Bare branches, trimmed to a balanced height
- Dried orange slices with holes for twine
- Short twine lengths for hanging slices
Avoid this: a light vase that tips when branches lean to one side.
10. Natural Linen and Burlap Layered Cloth

Best for: plain tables needing soft texture. Time: 10 minutes. Cost: low to medium. Effort: easy.
Layer a natural linen cloth over the table, then add a narrower burlap runner down the center for contrast. The two textures soften hard wood and plain plates, and the runner protects the linen under the centerpiece, pinecones, and serving dishes. Iron the linen first, so folds sit flat under the runner.
Check before you buy:
- Linen cloth covers the table with even overhang
- Burlap runner is clean, dry, and free of loose fibers
- Colors stay muted: cream, tan, sage, or soft brown
- Cloth can be washed or shaken out after the meal
Avoid this: burlap that sheds fibers over food and plates.
11. Wooden Bowls With Nuts and Dried Fruit

Best for: shared tables and long meals. Time: 10 minutes. Cost: low to medium. Effort: easy.
Set small wooden bowls of mixed nuts, dried orange pieces, and dried apple slices along the table for guests to share before and after the main course. The bowls add natural color at intervals, fill gaps between settings, and clear away quickly when plates arrive. Refill bowls only after the main course, to limit spills.
Steps:
- Choose wooden bowls that sit flat and stable.
- Fill each bowl only two-thirds full.
- Place bowls between settings, not in front of plates.
- Add a small spoon or scoop for shared serving.
Avoid this: bowls placed so close to plate edges that elbows knock them.
12. Pinecone and Orange Tiered Stand Display
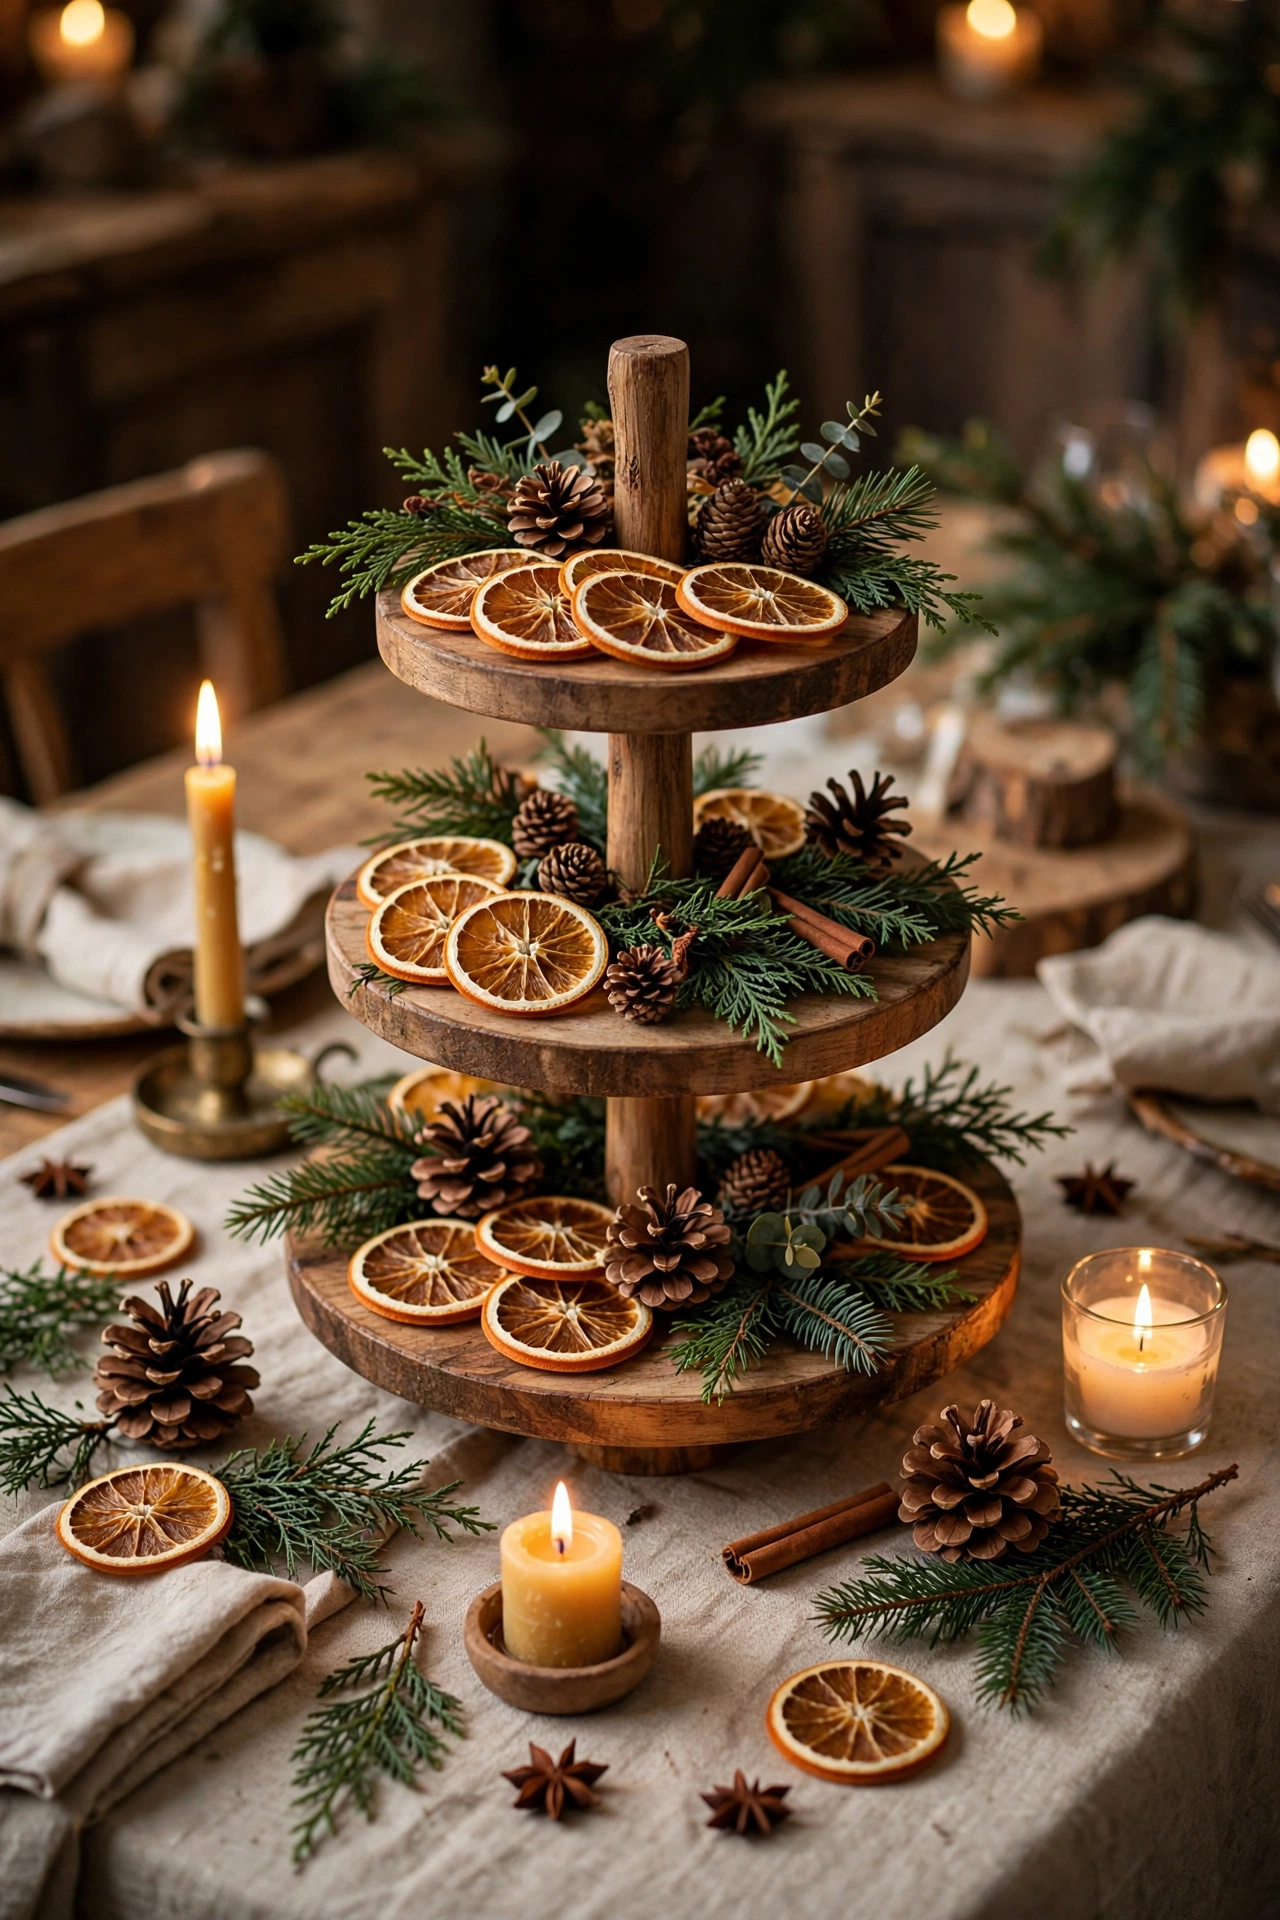
Best for: side tables and dessert tables. Time: 20 minutes. Cost: low. Effort: easy.
Use a two- or three-tier stand on a side table to display pinecones, dried orange slices, and small evergreen sprigs in layers. The stand keeps natural decor off the main table, adds height to a side surface, and doubles as a display for small desserts after the meal. Keep the stand clear of doorways, where guests reach past it.
What you need:
- Stable two- or three-tier stand
- Pinecones in mixed sizes
- Dried orange slices, fully dry
- Short evergreen sprigs for filling gaps
Avoid this: an unstable stand that rocks when guests reach for items.
Quick Checklist
- Oranges are fully dry, firm, and free of soft spots.
- Pinecones are clean, dry, and stable on flat surfaces.
- Runner and centerpiece leave room for plates and dishes.
- Name cards are clear, upright, and easy to read.
- Water bowls sit low, stable, and clear of elbows.
- Table is tested with plates down before guests arrive.
Common Questions
How far ahead can dried orange slices be prepared?
Dry slices fully, cool them, and store them in a dry, airtight container for several weeks. Check them before use and discard any slice that feels soft, damp, or sticky.
Do pinecones need cleaning before use on a table?
Yes, in most cases. Shake off loose debris, brush the scales gently, and let pinecones dry fully before placing them near plates, linen, or food.
How can a natural table stay safe with candles nearby?
Keep dried oranges, pinecones, evergreen stems, and paper cards well away from open flames. Use flameless LED candles for glow near natural materials, and never leave lit candles unattended.