
Gingerbread decor does not need an oven, icing, or a recipe. Paper, felt, cardboard, wood, and fabric give the same warm brown, white trim, and candy color, and the finished pieces last far longer than baked gingerbread. Choose brown tones that match across paper, felt, and wood, so pieces from different materials still read as one set. Test paint pens on scrap card first.
Use the rating line under each heading to choose by time and cost. Cut one test piece before cutting a full set, and keep paper and felt away from open flames and heat. The checklist at the end covers that test in one pass. Label storage boxes by room, so each set returns to the same spot next year.
1. Paper Gingerbread House on a Shelf
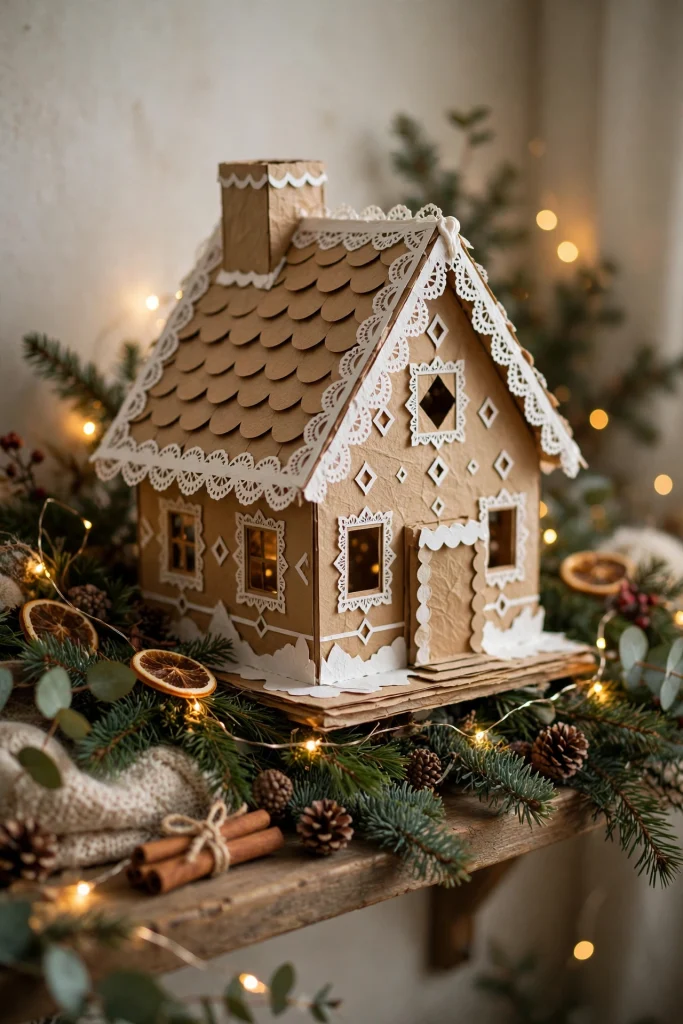
Best for: shelves and mantels. Time: 45 minutes. Cost: low. Effort: easy.
Cut house walls and a roof from stiff brown card, fold the pieces into shape, and add white paper trim for icing lines, windows, and a door. The house stays light enough for a shelf edge, and flat sides make it simple to store upright after Christmas. Fold corners crisply, and press seams flat before gluing.
What you need:
- Stiff brown card in two or three sheets
- White paper for trim, windows, and door
- Craft glue or double-sided tape
- Ruler, pencil, and craft scissors
Avoid this: thin paper that folds, bends, or tears at the corners.
2. Felt Gingerbread Ornaments With Stitching

Best for: Christmas trees and gift tags. Time: 30 minutes each. Cost: low. Effort: medium.
Cut two gingerbread shapes from brown felt, stitch the edges with white thread, and stuff the shape lightly before closing the seam. The stitching reads as icing, the felt holds its shape on a branch, and the ornament survives storage without cracking or crumbling. Use the same thread color for the whole set.
Steps:
- Cut two matching gingerbread shapes from brown felt.
- Stitch around the edge, leaving a small opening.
- Add light stuffing and stitch the opening closed.
- Sew a hanging loop at the top center.
Avoid this: heavy stuffing that distorts the shape and pulls stitches tight.
3. Cardboard Gingerbread Village on a Windowsill

Best for: windowsills and side tables. Time: 1 hour. Cost: low. Effort: medium.
Cut three or four small houses from cardboard in different heights, paint or cover them in brown, and add white trim, doors, and roofs. Line the houses along a windowsill with gaps for light, so the village reads as a street scene from inside and outside. Paint edges first, then faces, for clean lines.
Check before you buy:
- Cardboard is stiff, clean, and free of bends
- Brown paint or paper covers edges fully
- White trim paint or paper is opaque and bright
- Houses stand flat without leaning or rocking
Avoid this: houses that lean forward and block window light unevenly.
4. Gingerbread Garland From Paper Shapes

Best for: mantels, rails, and doorways. Time: 40 minutes. Cost: low. Effort: easy.
Cut gingerbread people, houses, and stars from brown card, add white dot and line details with a paint pen, and thread the shapes on twine. The garland hangs flat, stores rolled or folded, and suits a mantel, stair rail, or doorway without hooks in walls. Space shapes evenly, and check the span before hanging.
What you need:
- Brown card for shapes, in several sheets
- White paint pen for icing details
- Twine long enough for the full span
- Hole punch for threading each shape
Avoid this: shapes hung too close together, which hide the white details.
5. Gingerbread Gift Tags With White Trim

Best for: wrapped gifts and treat bags. Time: 25 minutes for a set. Cost: low. Effort: easy.
Cut small gingerbread shapes from brown card, add a white border and a simple face with a paint pen, and write the name on the back. The tags match wrapped gifts in kraft paper or red and green, and the flat shape slips under ribbon without adding bulk. Keep tags flat under a book while ink dries.
Steps:
- Cut gingerbread shapes in one consistent size.
- Add a white border and face details with a paint pen.
- Let the ink dry fully before handling the tags.
- Write names on the back and tie tags to gifts.
Avoid this: wet ink that smudges onto wrapping paper and ribbon.
6. Felt Gingerbread Wreath for a Door
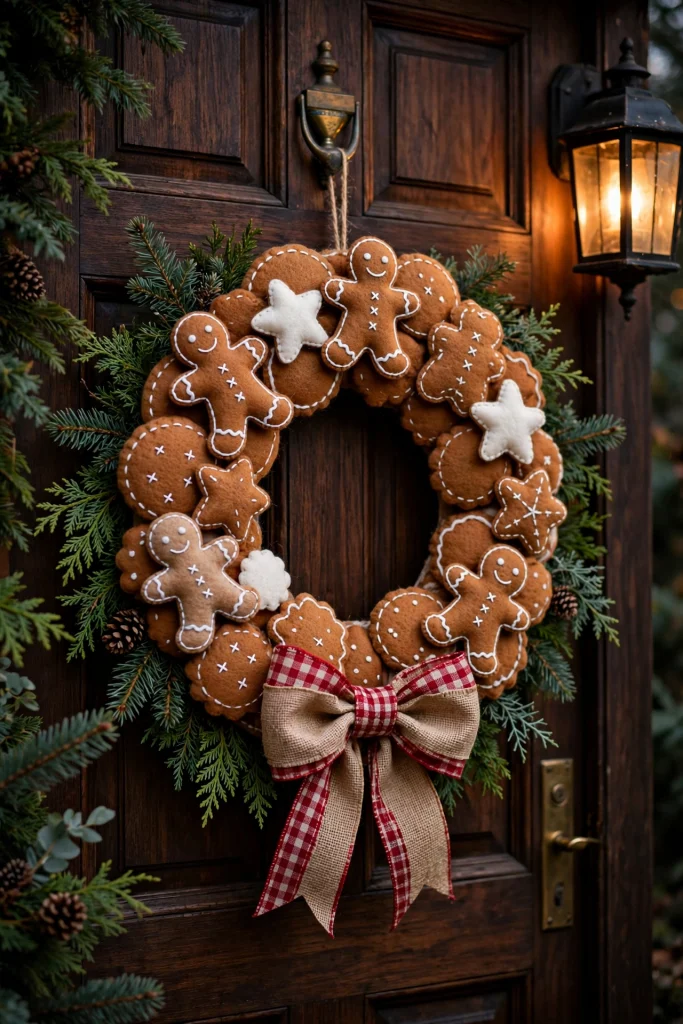
Best for: interior doors and walls. Time: 1 hour. Cost: low to medium. Effort: medium.
Cover a foam or cardboard wreath ring with brown felt, then glue small felt gingerbread shapes, candy dots, and white trim around the ring. The wreath stays light for an interior door hook, and felt shapes keep their color and edges through several seasons of storage. Glue shapes one at a time, checking balance as the ring fills.
Check before you buy:
- Wreath ring is firm and holds a round shape
- Felt is thick enough to cover the ring fully
- Glue holds felt shapes without soaking through
- Hook rating suits the finished wreath weight
Avoid this: a heavy wreath on a weak hook that slips overnight.
7. Wooden Gingerbread Signs With Painted Trim
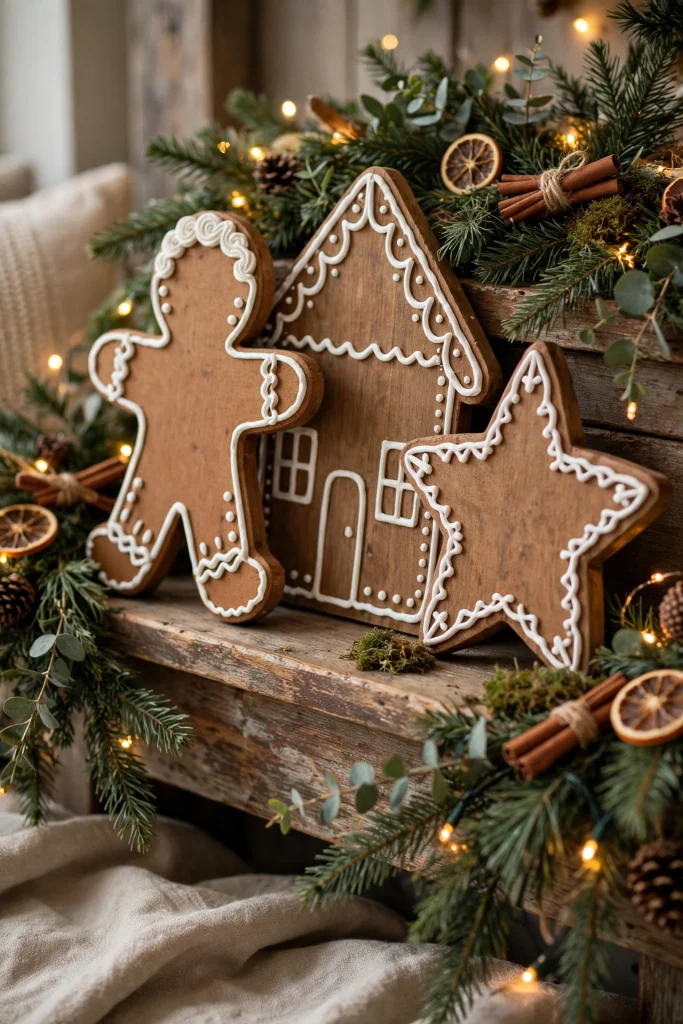
Best for: porches, halls, and kitchens. Time: 1 hour. Cost: medium. Effort: medium.
Cut or buy a flat wooden gingerbread shape, paint it warm brown, and add white trim lines, dots, and a simple face with a fine brush or paint pen. Seal the paint for use near a door, and hang the sign flat so wind and handling do not bend or chip the edges. Sand lightly between coats for smoothness.
What you need:
- Flat wooden gingerbread shape, sanded smooth
- Warm brown paint and a fine brush
- White paint pen for trim and dots
- Clear sealer suited to the surface used
Avoid this: unsealed paint that chips when the sign is handled or stored.
8. Gingerbread Bunting for a Kids Room

Best for: kids rooms and party walls. Time: 35 minutes. Cost: low. Effort: easy.
Cut gingerbread shapes and triangles from brown and cream card, add simple white details, and clip or thread them on a string across a wall. The bunting adds color at eye level, comes down without wall damage when clips are used, and stores flat in an envelope. Use the same string length for matching walls.
Steps:
- Cut shapes and triangles in a repeating pattern.
- Add white details and let the ink dry fully.
- Thread shapes on string with even spacing.
- Hang with removable clips, not nails or pins.
Avoid this: heavy shapes that pull string down in the middle.
9. Gingerbread Window Clings From Craft Film

Best for: windows and glass doors. Time: 30 minutes. Cost: low. Effort: easy.
Cut gingerbread shapes from static-cling craft film in brown and white, press them onto clean glass, and smooth out air bubbles with a soft cloth. The clings peel off without residue, suit rented homes, and can be moved to a new window without cutting a fresh set. Smooth bubbles from the center outward, gently.
Check before you buy:
- Film is made for static cling on glass
- Shapes are large enough to read from outside
- Glass is clean, dry, and free of dust
- Clings are stored flat, not folded or creased
Avoid this: adhesive film that leaves residue on glass after removal.
10. Gingerbread Table Runner From Stamped Fabric

Best for: dining tables and side tables. Time: 50 minutes. Cost: low to medium. Effort: medium.
Stamp gingerbread shapes onto a plain cotton runner with brown and white fabric paint, using a foam stamp or a cut potato stamp for repeat shapes. The runner adds a handmade pattern to the table, washes gently when paint is heat-set, and matches plain plates and linen napkins. Test the stamp on scrap fabric first.
What you need:
- Plain cotton table runner, washed and ironed
- Brown and white fabric paint
- Foam stamp in a gingerbread shape
- Iron for heat-setting paint, per paint instructions
Avoid this: paint that is not heat-set, which fades in the wash.
11. Gingerbread Door Hanger From Cardboard
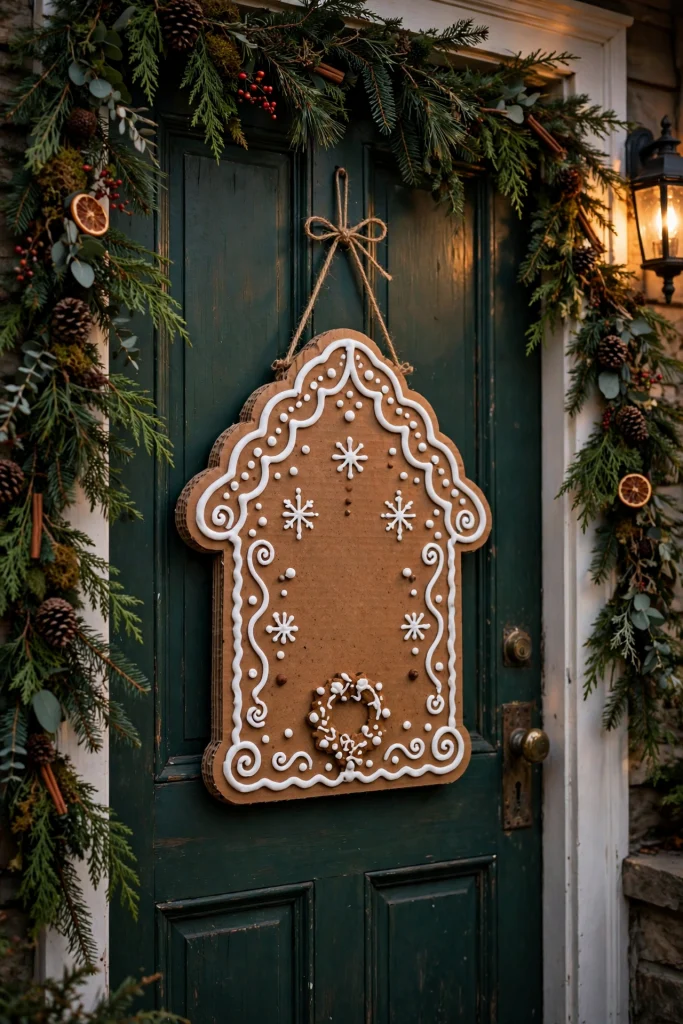
Best for: bedroom and pantry doors. Time: 30 minutes. Cost: low. Effort: easy.
Cut a large gingerbread shape from stiff cardboard, add white trim and a face, and cut a hook slot at the top for a door handle. The hanger greets guests at a door, stays flat against the surface, and lifts off in seconds when the door needs full use. Reinforce the slot edges with extra card.
Steps:
- Cut a large gingerbread shape from stiff cardboard.
- Add white trim, dots, and a simple face.
- Cut a hook slot wide enough for the handle.
- Test the hanger on the door before adding ribbon.
Avoid this: a slot too narrow, which bends the cardboard when hung.
12. Gingerbread Pillow Covers With Applique

Best for: sofas, beds, and reading corners. Time: 1 hour per cover. Cost: medium. Effort: medium.
Sew or iron-on a brown felt gingerbread shape onto a plain pillow cover, add white stitching or trim for icing, and finish the edges so the shape survives washing. The cover adds a clear Christmas theme to a sofa without a full set of seasonal cushions, and the flat applique stays comfortable to lean against. Wash covers inside out, gently.
What you need:
- Plain pillow cover in cream, red, or green
- Brown felt for the gingerbread shape
- White thread or trim for icing details
- Iron-on adhesive or needle and thread
Avoid this: raised buttons or beads on a pillow meant for leaning.
Quick Checklist
- One test piece is cut and checked before a full set.
- Card and felt are stiff enough to hold their shape.
- White trim is dry before pieces are stacked or hung.
- Paper and felt stay away from flames and heat.
- Hanging pieces are tested for weight and balance.
- Finished pieces store flat, dry, and labeled by set.
Common Questions
Can gingerbread decor be used outside without baking?
Only with sealed wood or weather-proof materials, and only under cover. Paper, felt, and cardboard suit indoor use, because rain and damp soften edges and blur trim quickly.
How can white trim stay bright on brown card?
Use an opaque white paint pen or thick white paint, and let each layer dry fully before adding the next. Thin white ink soaks into brown card and turns pale or patchy.
How should felt gingerbread ornaments be stored?
Store them flat or hanging, in a dry box with tissue between layers. Keep heavy items off the top, and check stitching and loops before hanging them again next year.